Convert CSV/Excel, PDF, QFX/OFX/QBO, QIF, MT940 to QIF and import into Quicken
Need to import bank or credit card transactions in a CSV/Excel, PDF, QFX/OFX/QBO, QIF, MT940 file into Quicken for Windows or other QIF importing software or online service, but cannot seem to make it work? The problem is that your bank only provides transactions in a format that Quicken for Windows or other QIF importing software or online service cannot read.
The Solution: try ProperConvert (Bank2QIF) app. It can convert your transactions into a format from CSV/Excel, PDF, QFX/OFX/QBO, QIF, MT940 to QIF can import.

Convert transaction files to the QIF format
- ProperConvert (Bank2QIF) extracts transactions from CSV/Excel, PDF, QFX/OFX/QBO, QIF, MT940 files. It creates QIF files ready to import into Quicken for Windows or other QIF importing software or online service.
- No data entry: convert data you already have in bank, credit card or investment transactions file format to the QIF format
- Smart: ProperConvert (Bank2QIF) understands many layouts. It finds columns like date, amount, description, etc. of your transactions.
- Easy to use: Converting your banking transactions into QIF files could not be any easier. In a few clicks, you will have all your transactions converted to importable by Quicken for Windows or other QIF importing software or online service format in no time at all.
- Free trial and support: try it for Free before you buy and receive full support before and after you order.
- Safe to use: ProperConvert (Bank2QIF) converts all your banking transactions on your computer.
How can I use ProperConvert to convert transactions from CSV/Excel, PDF, QFX/OFX/QBO, QIF, MT940 format?
- Download, install and run the software
- Select a CSV/Excel, PDF, QFX/OFX/QBO, QIF, MT940 file with transactions and review transactions
- Backup your accounting software file before importing any file
- Click Convert to convert CSV/Excel, PDF, QFX/OFX/QBO, QIF, MT940 to a QIF file
- Import created file to Quicken for Windows or other QIF importing software or online service
How to use Bank2QIF
This tutorial shows how to convert a file with transactions (CSV, PDF, QFX, OFX, QBO, QIF) to QIF format.
Use the ProperConvert app to convert your transaction files to required by your accounting software file format.
Step by step instructions
Download the app from the download page.
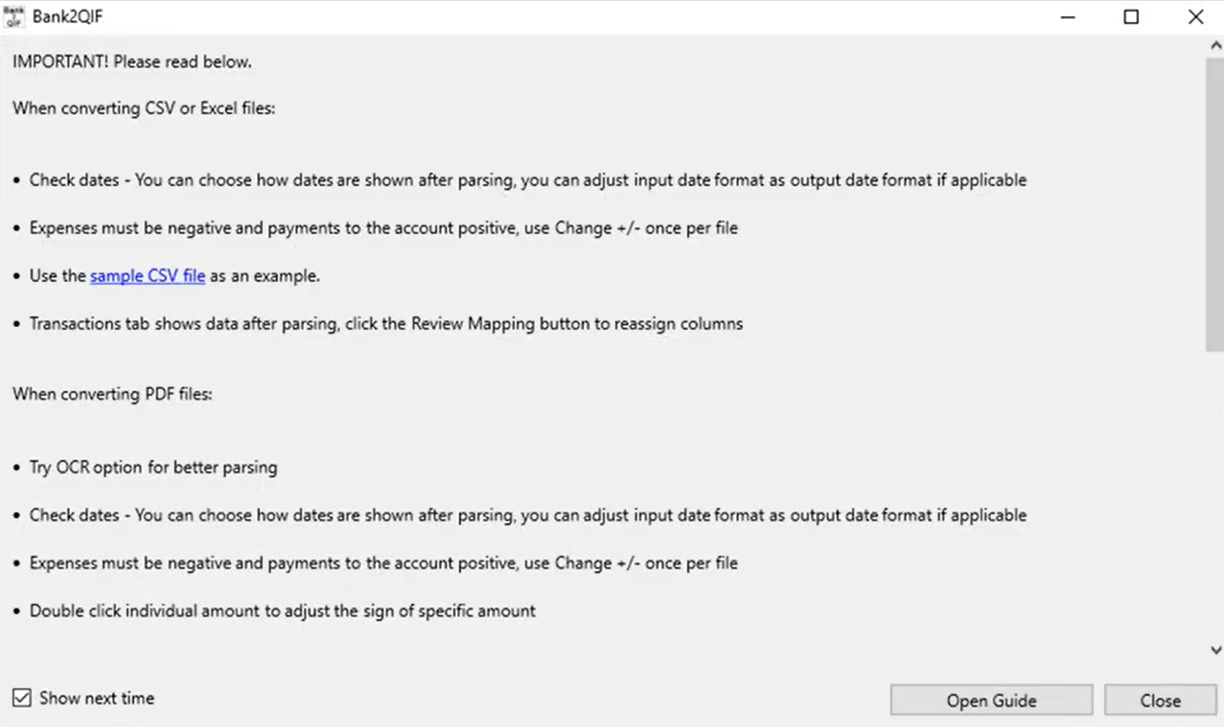
Once downloaded and installed, start Bank2QIF. Read the welcome message that provides the main points about the conversion process.
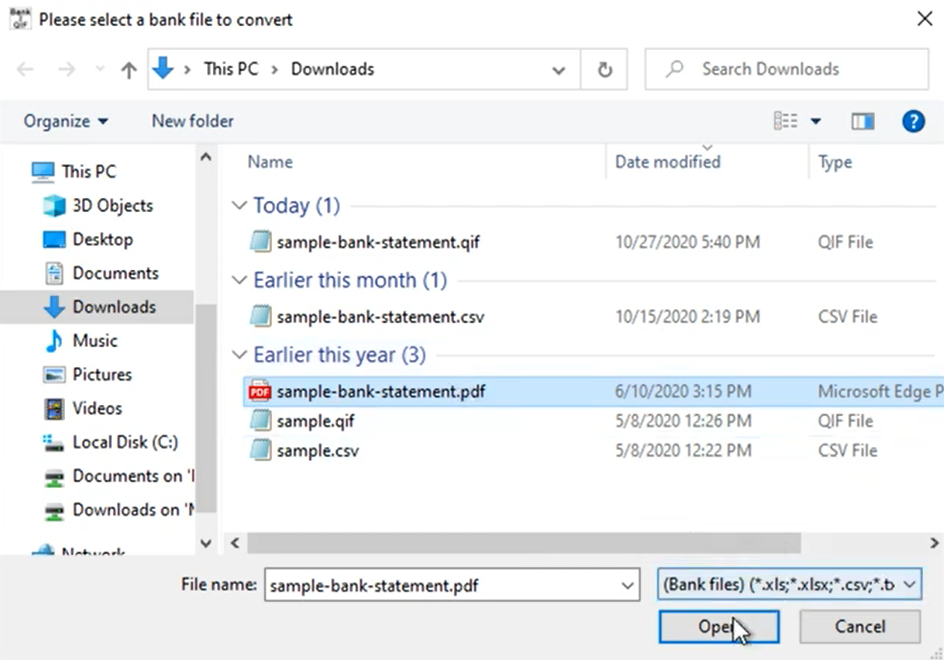
Select a file with transactions that you would like to convert. It could be a PDF bank or credit card statement, QIF or QMTF file exported from Quicken or other accounting software, OFX, QFX, QBO, STA or MT940 file downloaded from online banking.
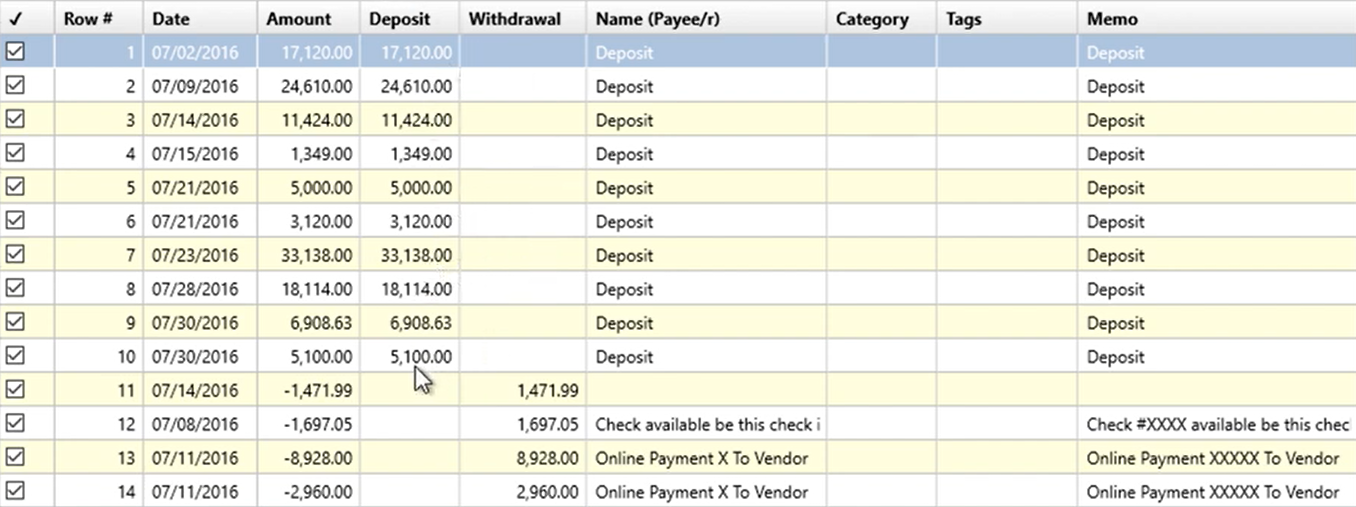
Review transactions before converting, make sure dates are correct, expenses are negative, and payments to the account are positive.
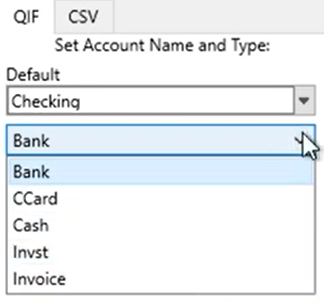
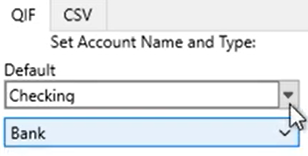
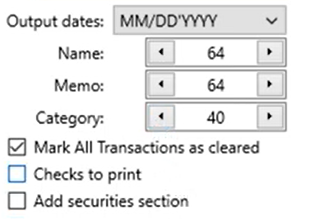
Set the Account Type.
Set the Account Name And depending on the QIF Target.
As you have in Quicken or other personal finance or accounting software. When you convert for multiple accounts, please make sure to adjust the Account Type and Account Name when you start working on another account.
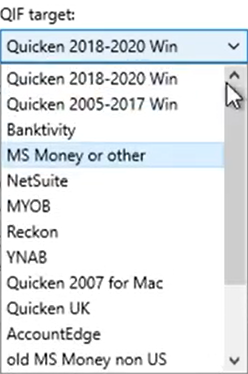
QIF target is important to set matching your accounting/finance software, as the converter will create the QIF file version compatible with your software.
There are some other settings that discussed in another video, I would skip these for now as you need them only in specific situations and you know when you need to change these settings.
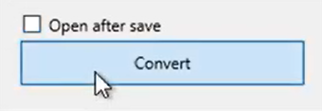
Set the “Open after save” checkbox if you would like the software installed on your computer to open the created QIF file. If you have Quicken installed, it would be Quicken to open this QIF file.
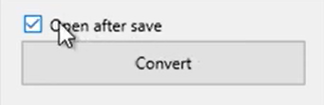
Click the 'Convert' button.
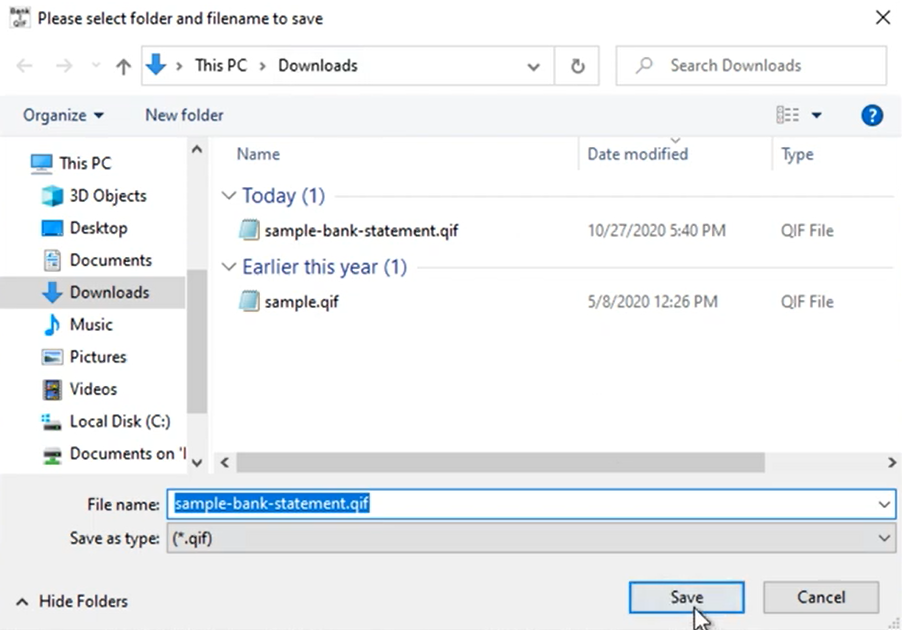
And confirm the filename and the file location.
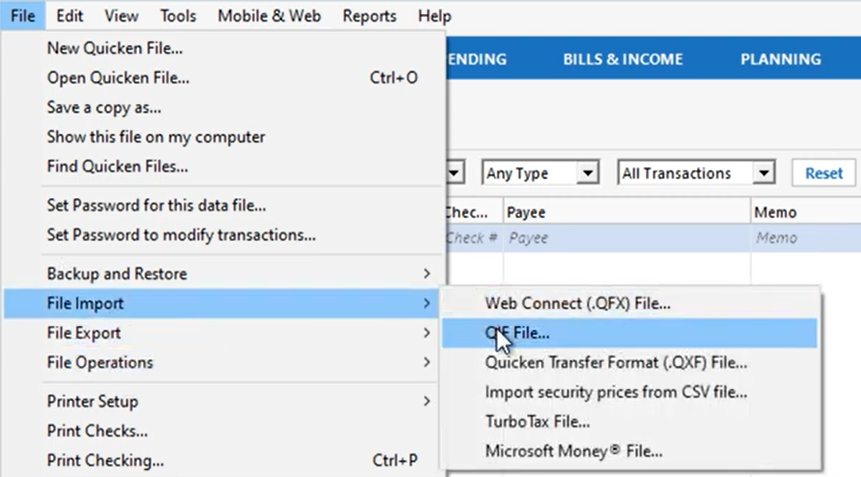
To import the created QIF file manually, in Quicken, click 'File' - 'File Import' - 'QIF file'.
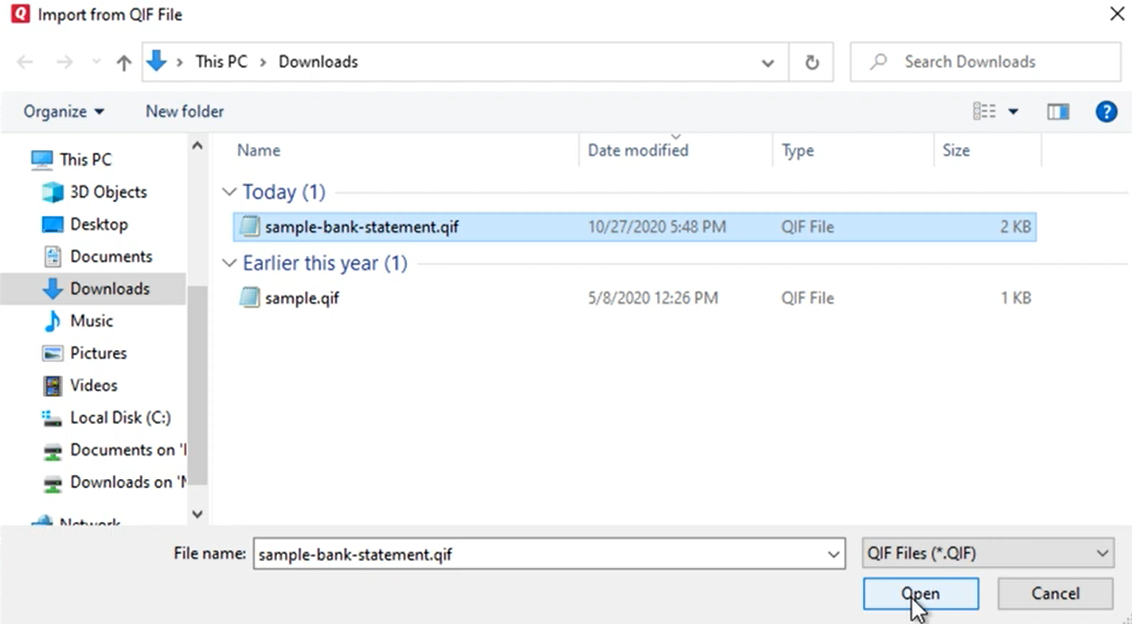
Then click the 'Browse' button.

Select the created QIF file.
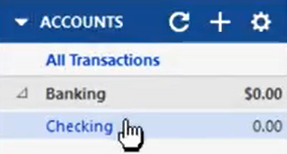
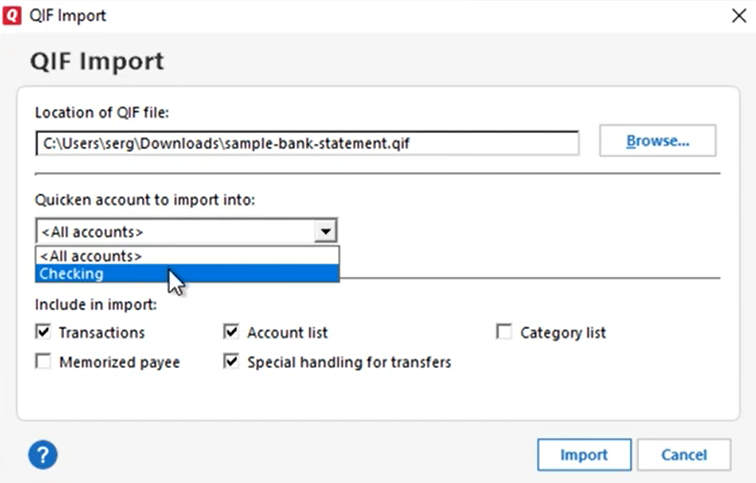
For Quicken 2018 or later, you need to select the account, where you want to import transactions. For Quicken 2017 or earlier, you have to select 'All accounts' to import the QIF file. Click the 'Import' button.
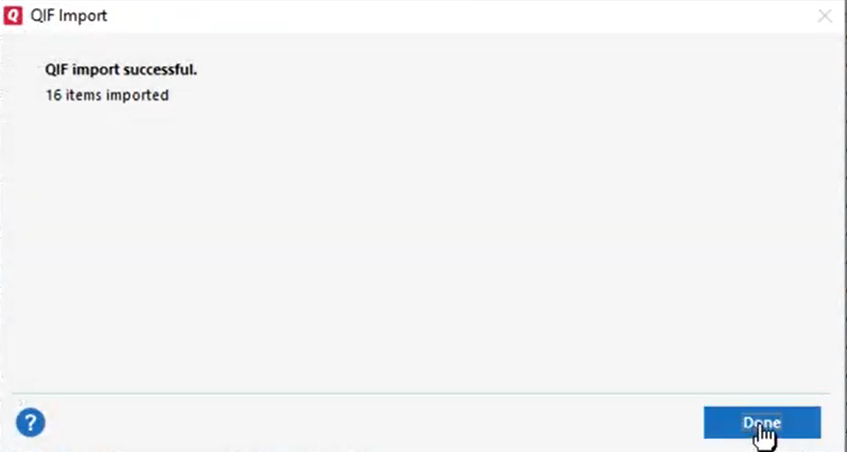
Transactions are imported.
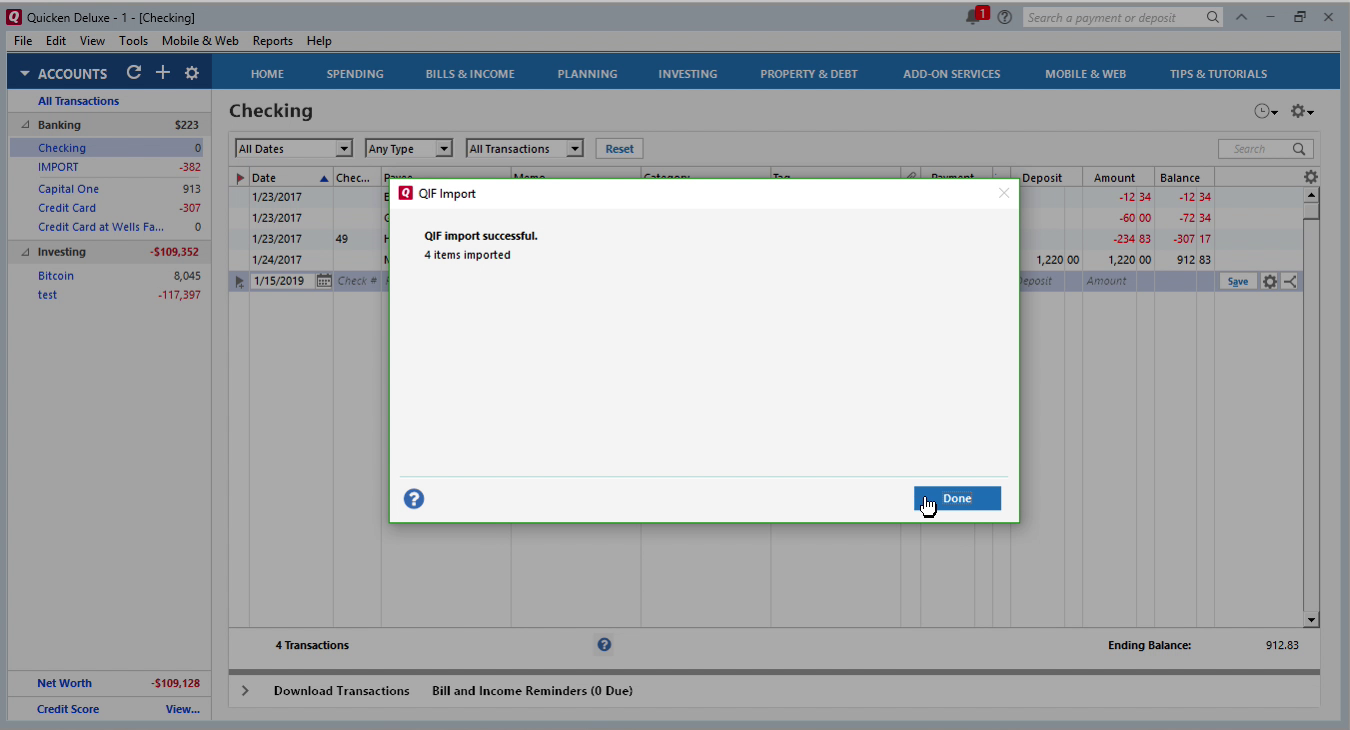
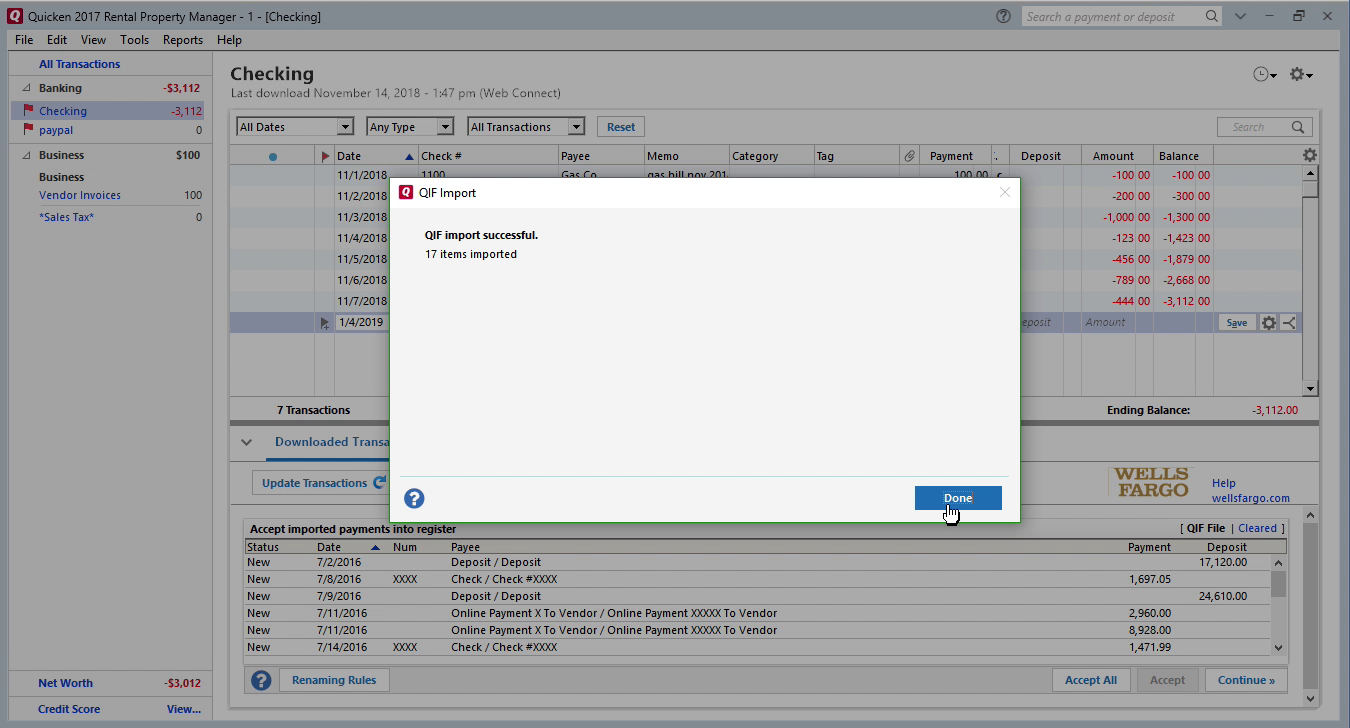
Import created QIF file into Quicken 2017
Now the QIF file is created, let's switch to Quicken and import created QIF file. Before importing a QIF file make sure to backup your data. To import a QIF file, select 'File' - 'File Import' - 'QIF File', select created QIF file.
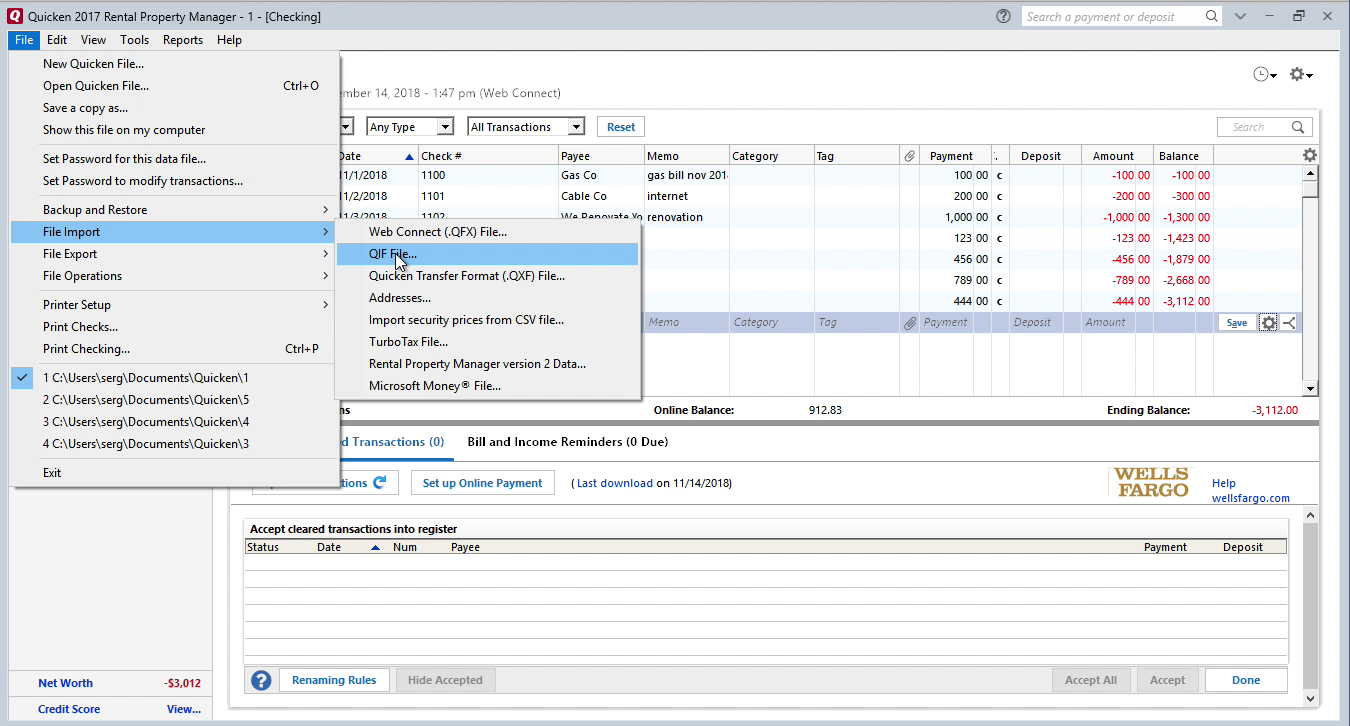
For Quicken 2017 or earlier, it is important to select ''All Accounts''. For Quicken 2018 or later you have to select the actual account.
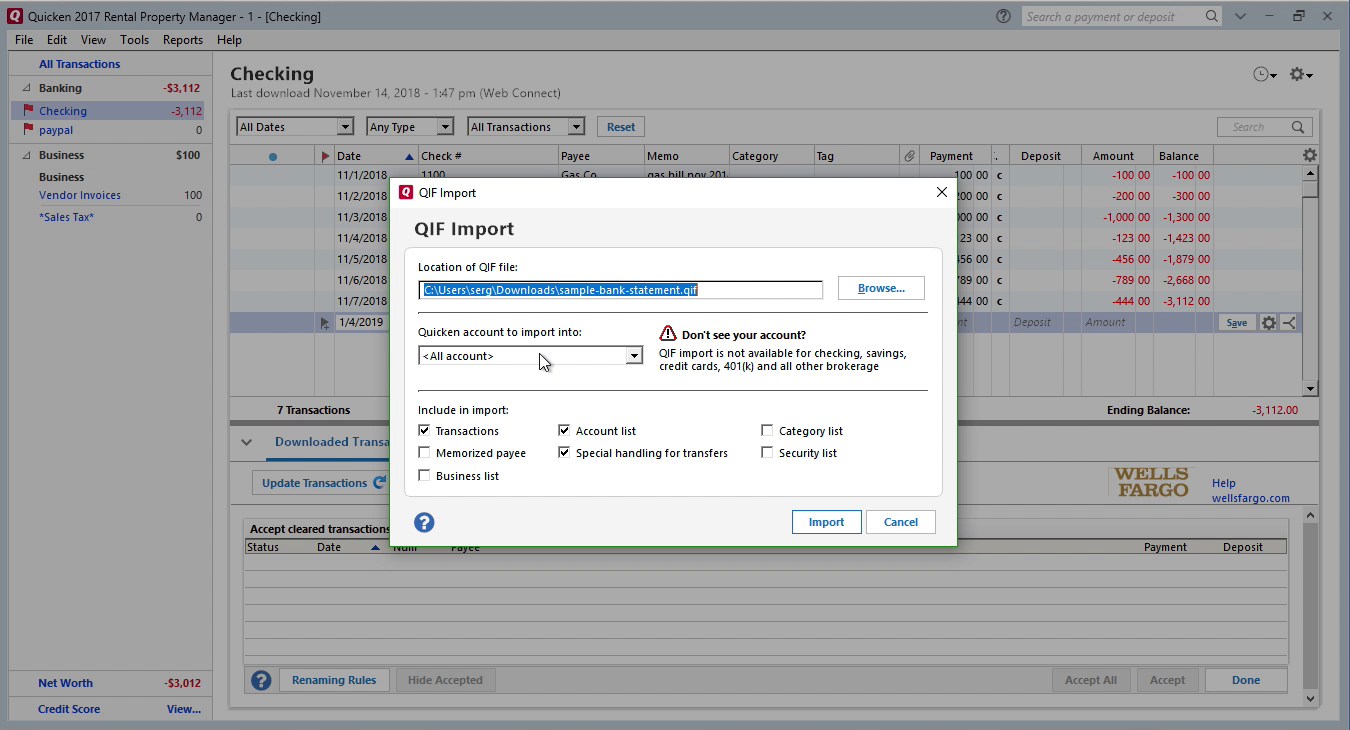
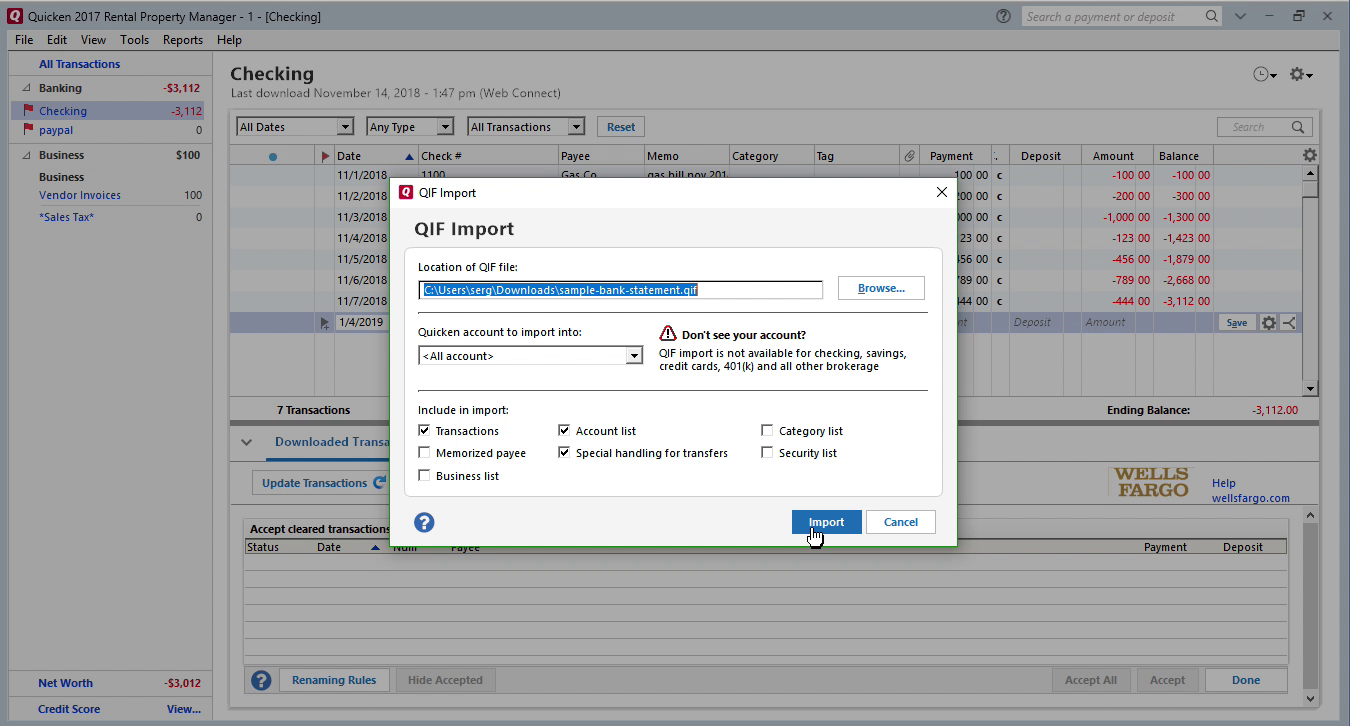
Then click the 'Import' button.
Then click the 'Done' button.
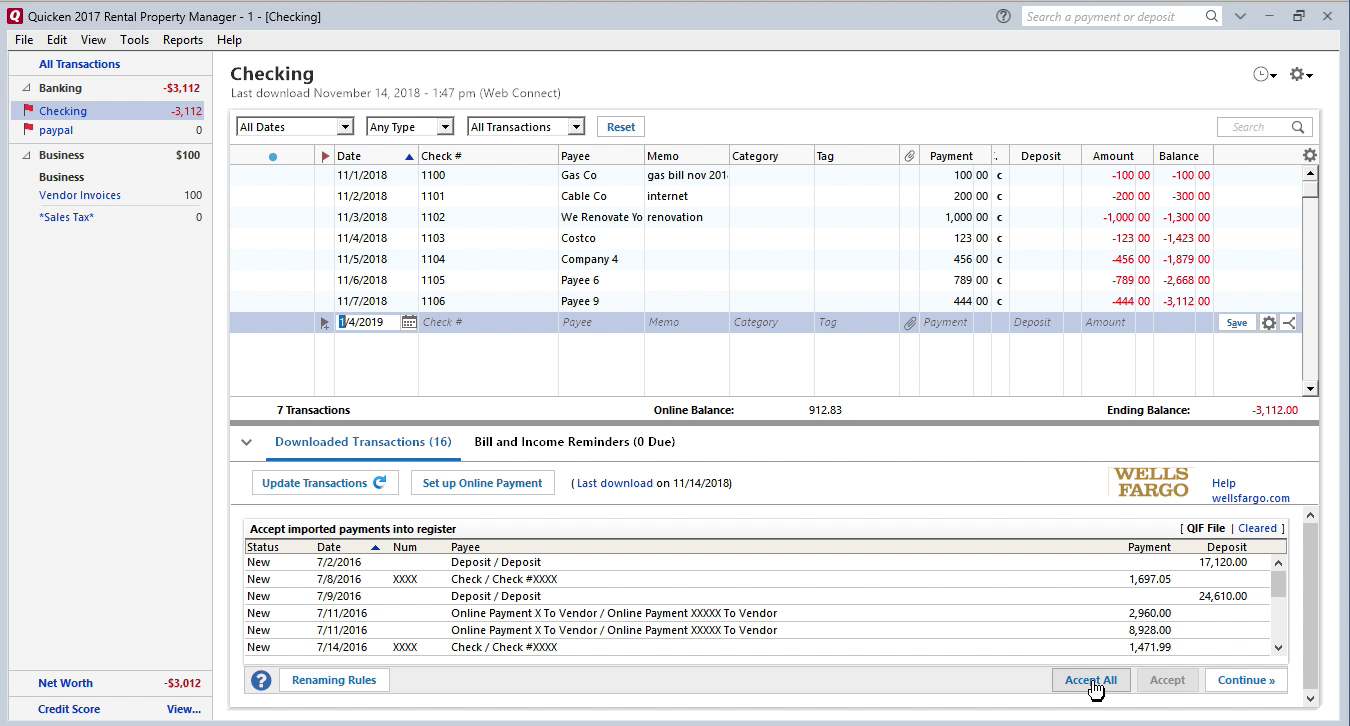
Now your data is imported. You can review transactions and use Renaming Rules if you like. Then click 'Accept All transactions'.
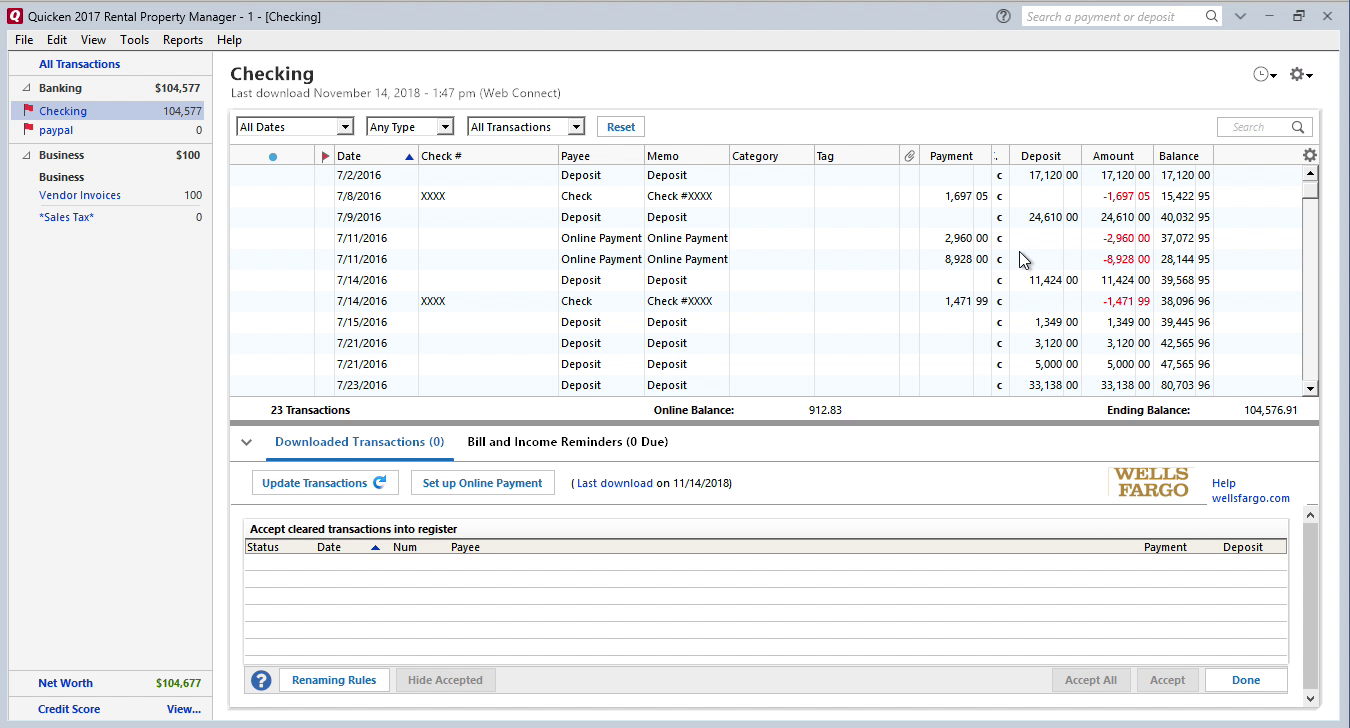
They accepted and listed in Quicken.
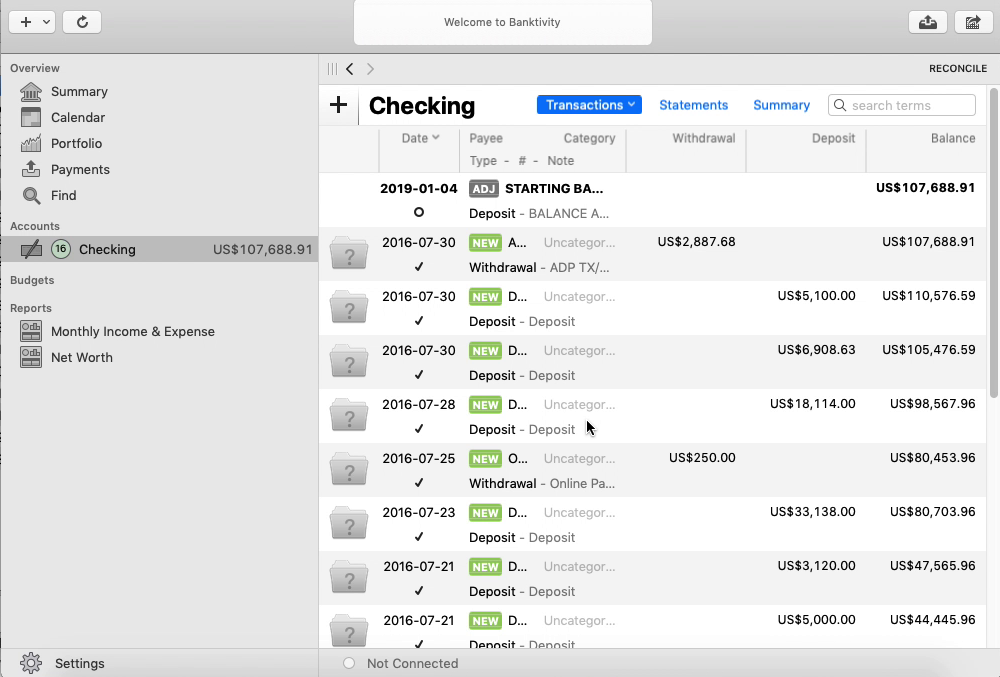
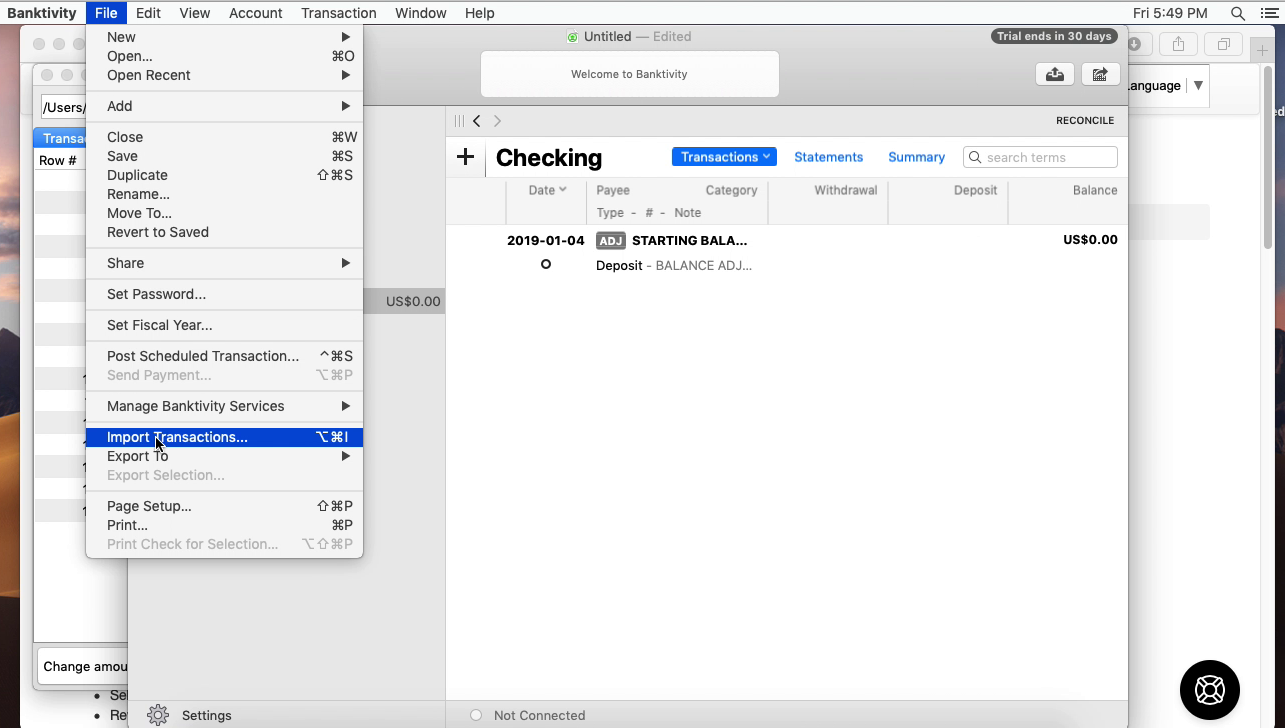
Import created QIF file into Banktivity
Now the QIF file is created, let's switch to Banktivity and import created QIF file. Before importing a QIF file make sure to backup your data. To import a QIF file, select 'File' - 'Import transactions'. Then click 'Import File', select created QIF file.
Select a Quicken account to import.
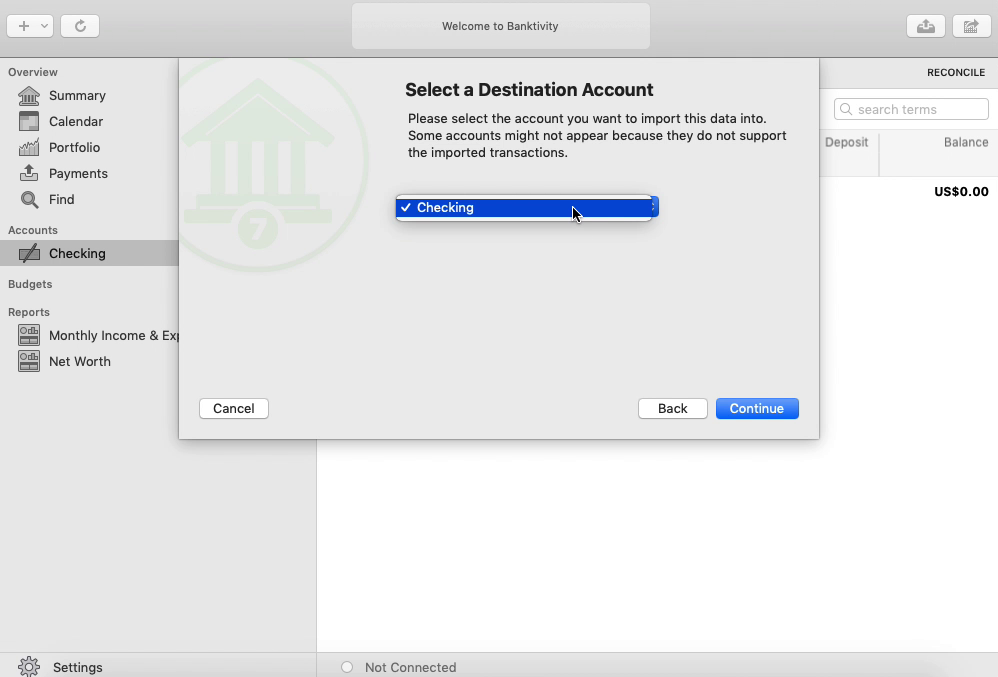
Then click the 'Continue' button.
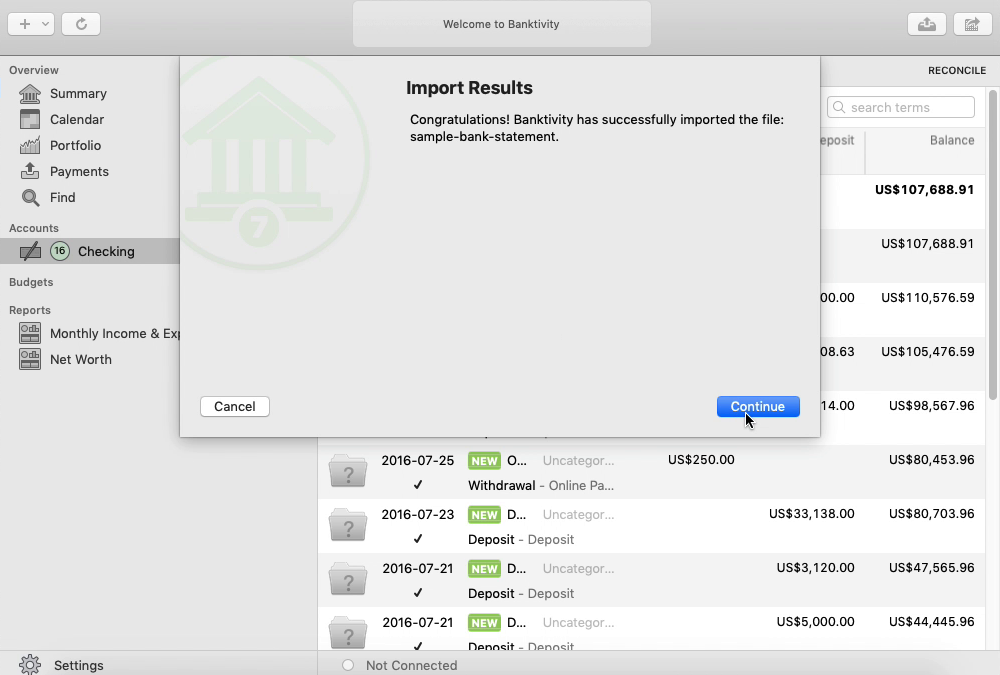
Now your data is imported. Review transactions after import.