How to import a QIF file into Quicken
Import a QIF file into Quicken (2017 or earlier) for Windows
Quicken Interchange Format (QIF) is a file format that is specifically designed to transfer financial data between different software programs, including personal finance management tools like Quicken. There are several reasons why QIF may be a better choice for importing data into Quicken compared to other file formats:
- Compatibility: QIF is specifically designed to be compatible with Quicken and other personal finance management software. This means that it can easily be imported into Quicken without any issues or errors. Other file formats, such as CSV (Comma Separated Values), may not be as compatible with Quicken and may require additional steps or conversions in order to be imported.
- Ease of use: QIF files are relatively easy to use and do not require any special software or technical skills to import into Quicken. As long as you have a QIF file and access to Quicken, you can import the data with just a few clicks.
- Data integrity: QIF files are designed to maintain the integrity of financial data during the import process. This means that the data in the QIF file will be imported into Quicken exactly as it appears in the file, without any loss of information or formatting errors.
- Customization: QIF files allow users to customize the data that is imported into Quicken. For example, you can choose to import only certain types of transactions or specify the date range for the imported data. This can be useful if you only want to import specific types of financial information into Quicken.
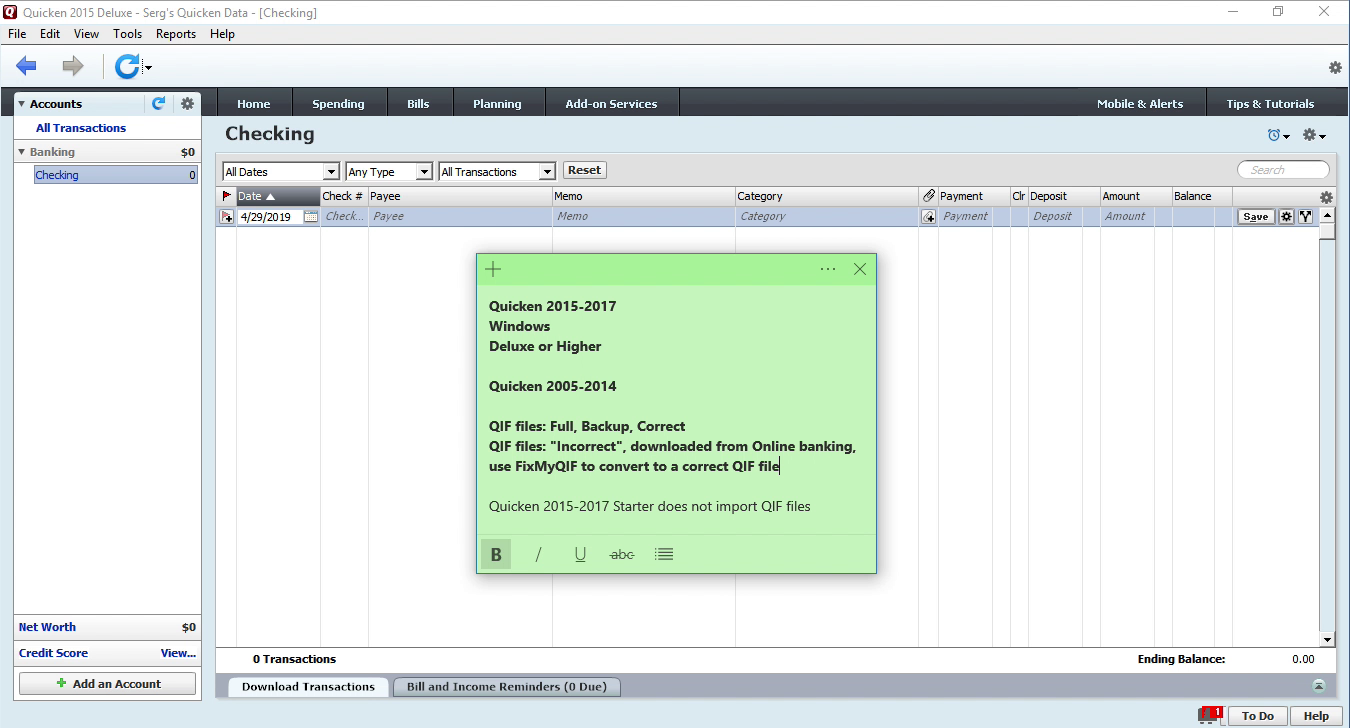
This tutorial works also on Quicken 2005-2017 Deluxe or higher editions, like Home Business. It doesn't work on the Quicken Starter Edition.
There are two types of QIF files:
- Full, Backup, or Correct QIF files;
- 'Incorrect' QIF files, usually downloaded from your Online banking. And you can use the ProperConvert app to convert such QIF files to the correct ones.
Now to import a QIF file into Quicken click 'File' - 'File Import' - 'QIF File'.
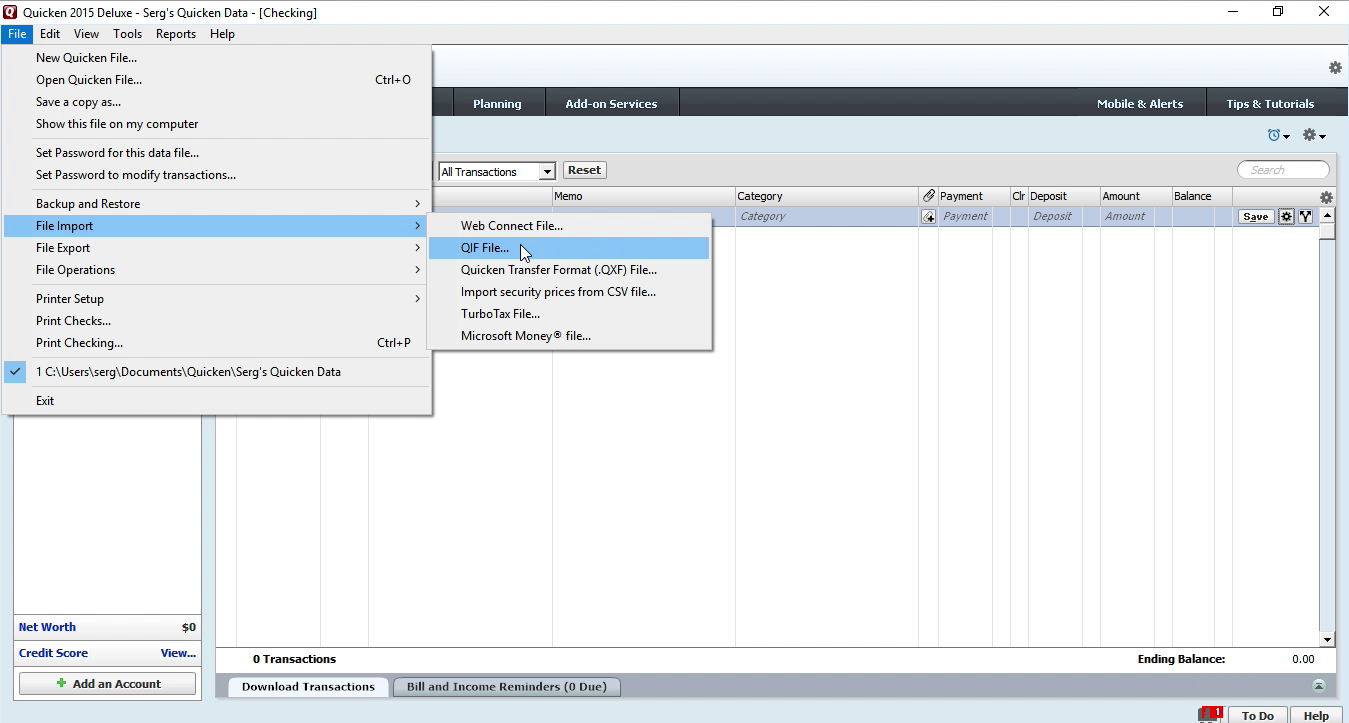
Then click the 'Browse' button and select a QIF file.

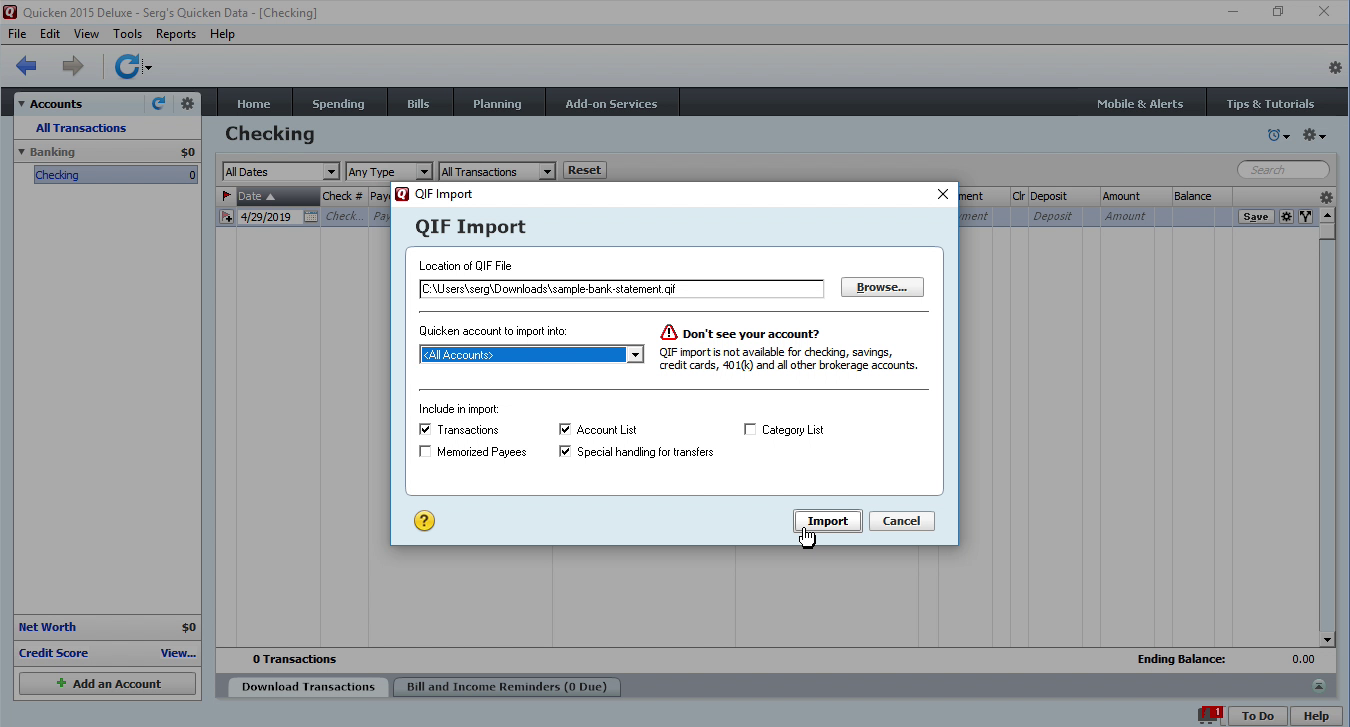
In our case, we have a Checking Account Name. We can not select it in the 'Quicken account to import into' Tab. We have only 'All Accounts', that's what we must select.
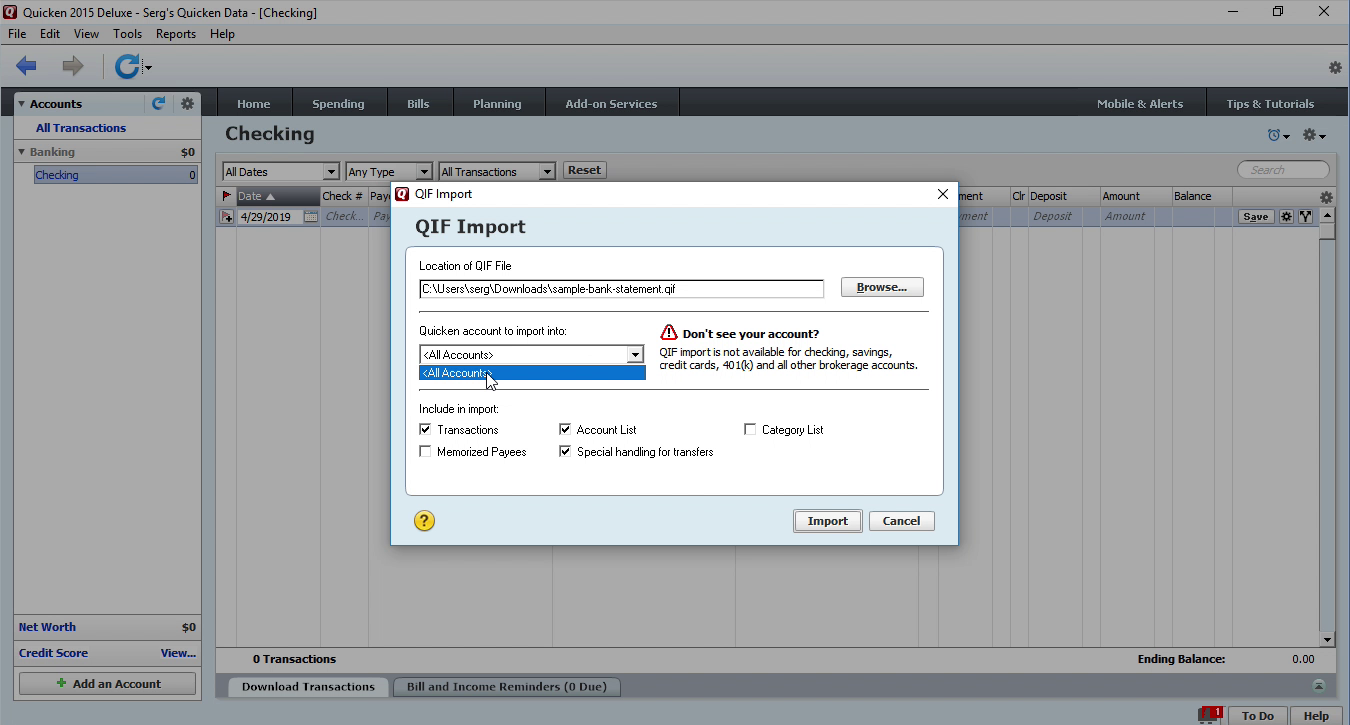
A QIF file has an Account Name, as part of the QIF file. When you are using ProperSoft converter you have to enter that Account Name before converting to a QIF file. In this case, we have a Checking Account and we enter the Account Name, as Checking.
You can ignore 'Don't see your account?' (QIF import is not available for checking, savings, credit cards, 401(k) and all other brokerage accounts) as long as you select 'All Accounts'. To import a QIF file click the 'Import' button.
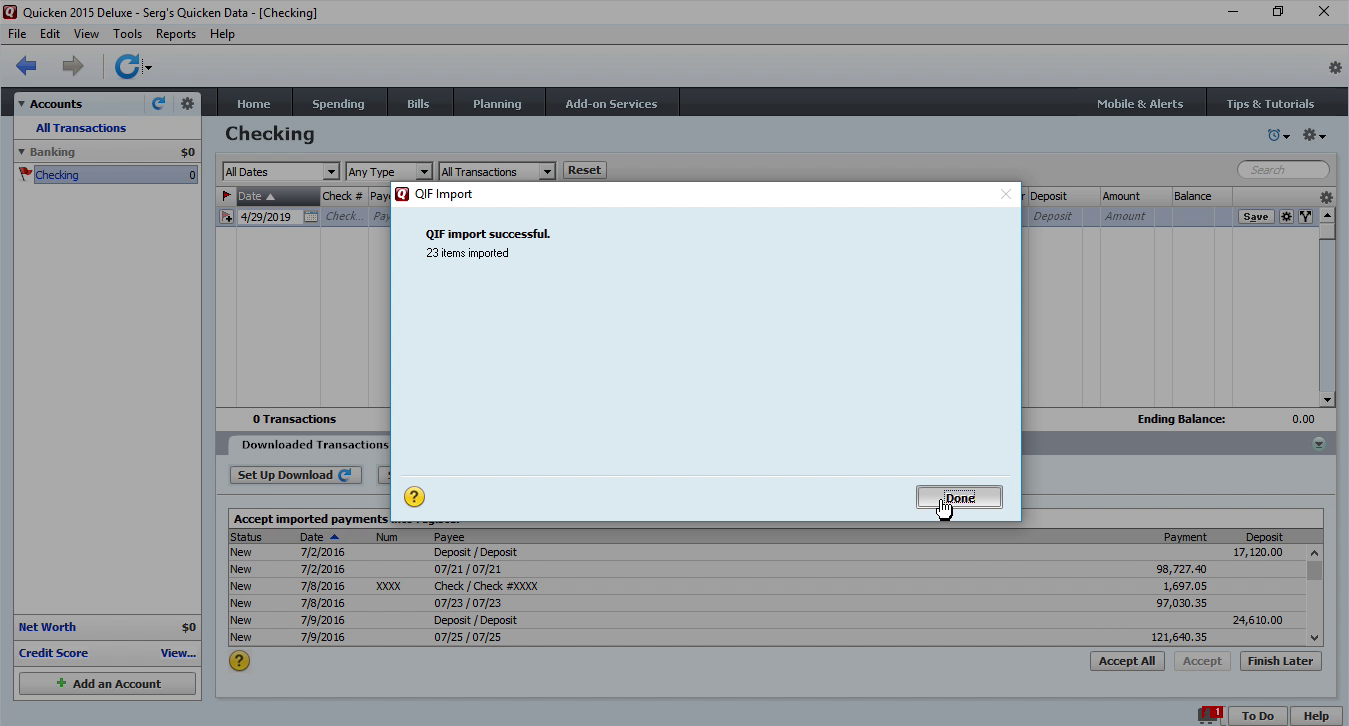
All transactions are successfully imported. Click the 'Done' button.
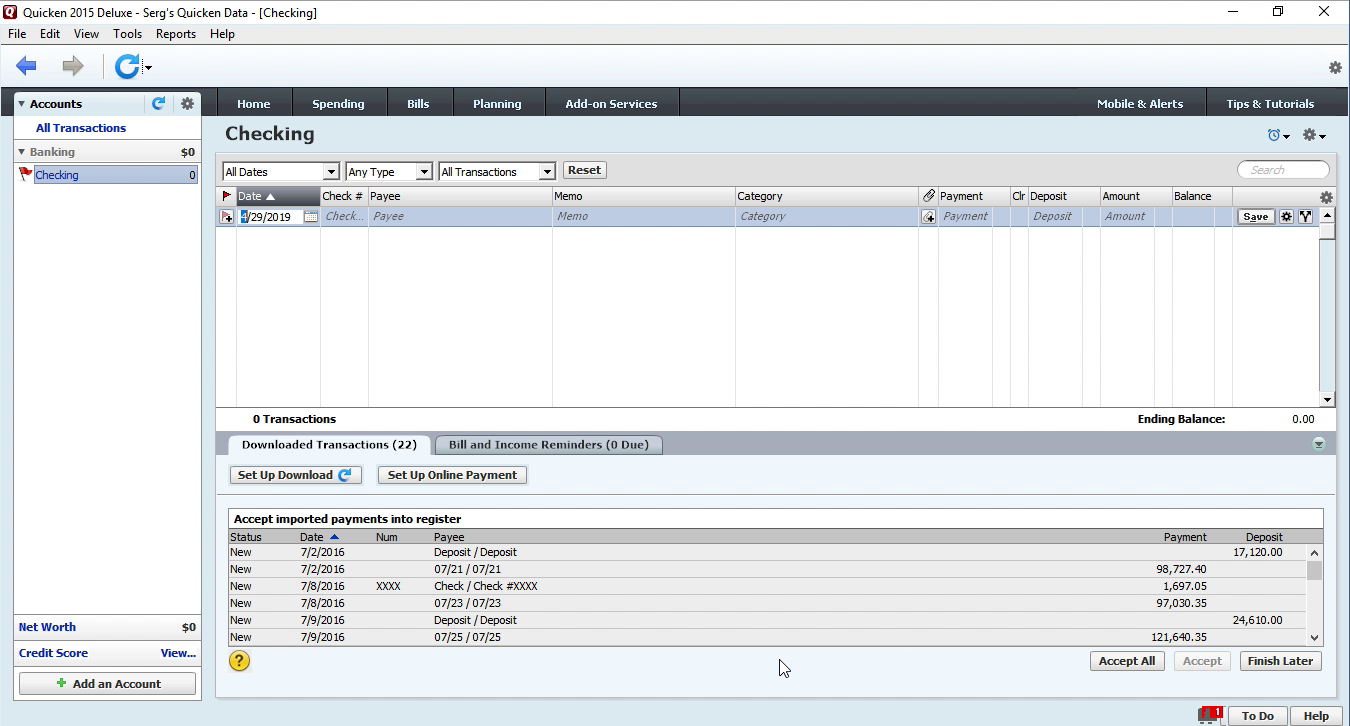
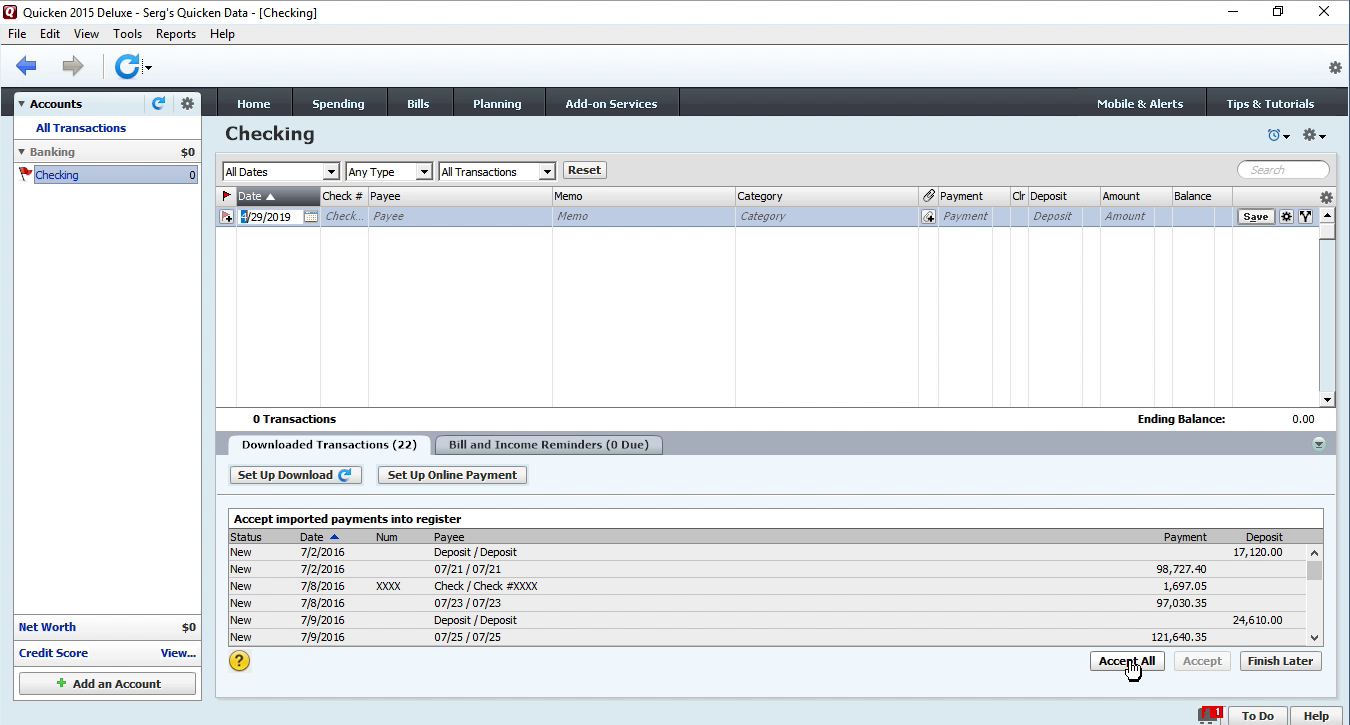
Transactions are not in the register yet.
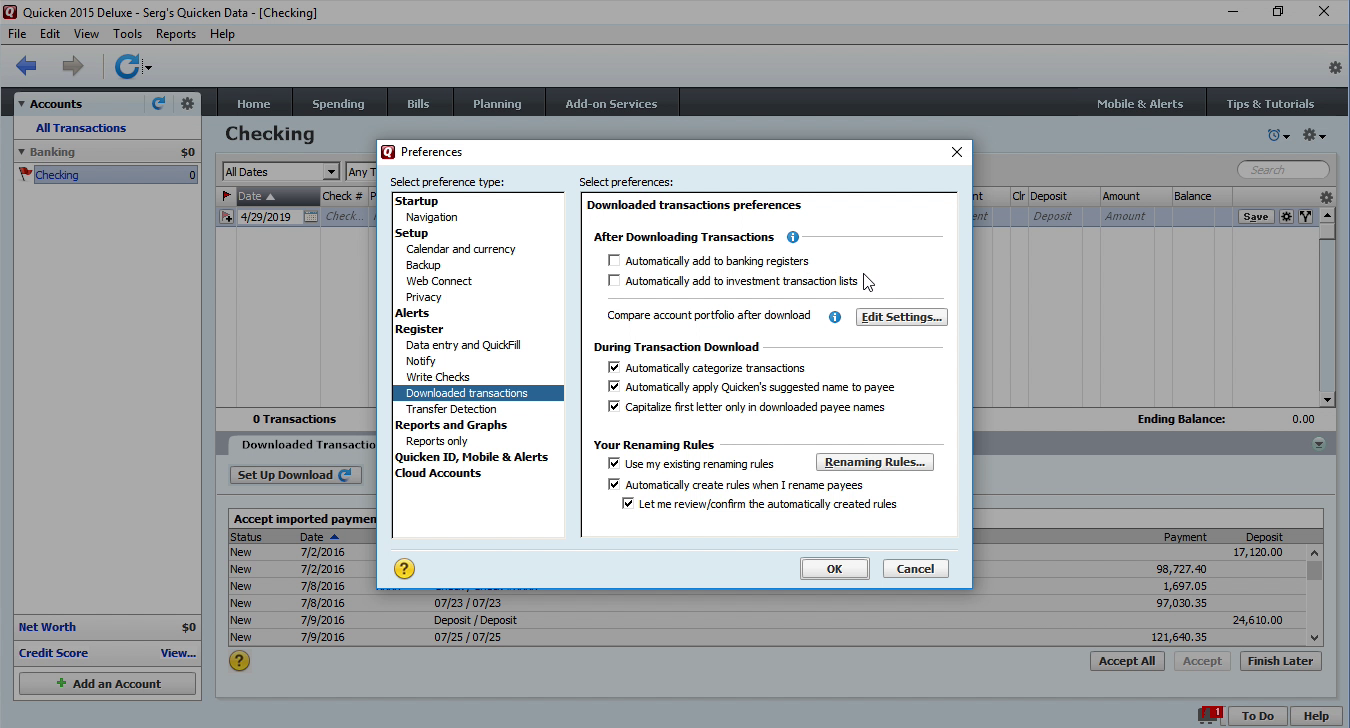
Review transactions before adding to the register. Click 'Edit' - 'Preferences'.

Edit 'Downloaded transactions preferences'. 'Automatically add to banking registers' and 'Automatically add to investment transaction lists' must be unchecked.
And when you like, what you see, you can accept all transactions. Click on 'Accept All' button.
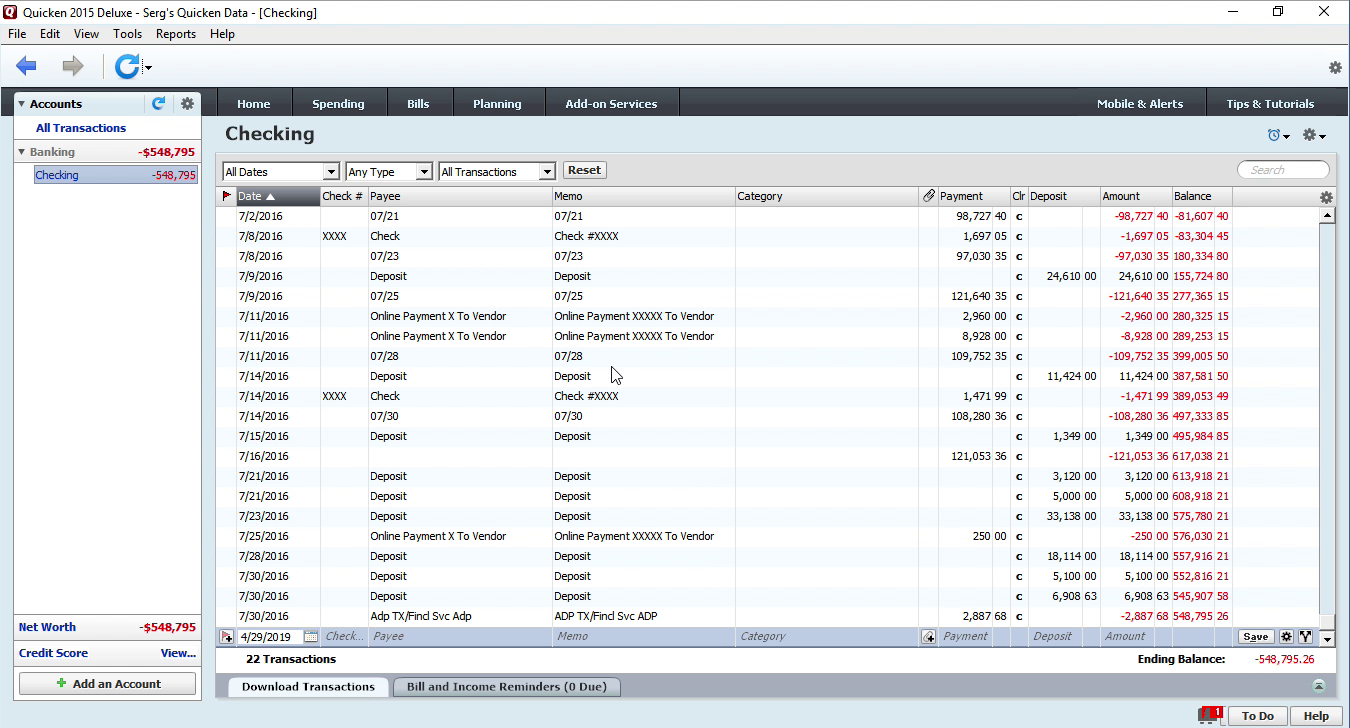
Now transactions are in the register.
Related articles
- Common Quicken errors and how to fix them
- Import QIF into Quicken 2005+
- How to import a QFX file into Quicken for Windows and Mac
- Review imported transactions in Quicken separately
- Import QFX into Quicken 2017 or earlier
- How To Convert a CSV File to the QIF Format and Import Into Quicken
- Extract data from a Quicken QDF file