Convert QIF files to CSV/Excel (QIF2CSV)
Need to work with bank or credit card transactions stored in an QIF file but cannot open it in Excel as a table with transaction? Excel or Google Sheets or another spreadsheet app does not work with QIF files directly.
The Solution: try ProperConvert (QIF2CSV) app. It can convert your transactions into a format from QIF to CSV/Excel.
Convert transaction QIF files to the CSV/Excel format
- ProperConvert (QIF2CSV) extracts transactions from QIF files. It creates CSV/Excel files ready to import into Excel, Quicken for Mac, Quickbooks Online.
- No data entry: convert data you already have in bank, credit card or investment transactions file format to the CSV/Excel format
- Smart: ProperConvert understands many layouts. It finds columns like date, amount, description, etc. of your transactions.
- Easy to use: Converting your banking transactions into CSV/Excel files could not be any easier. In a few clicks, you will have all your transactions converted to importable by Excel, Quicken for Mac, Quickbooks Online format in no time at all.
- Free trial and support: try it for Free before you buy and receive full support before and after you order.
- Safe to use: ProperConvert converts all your banking transactions on your computer.
Step by step instructions for Windows
This tutorial shows how to convert a QIF file from your bank or credit card statement to CSV format.
Use the ProperConvert app to convert QIF to CSV. Other formats are supported as well.
Follow the steps below for the Windows version, followed by the Mac version.
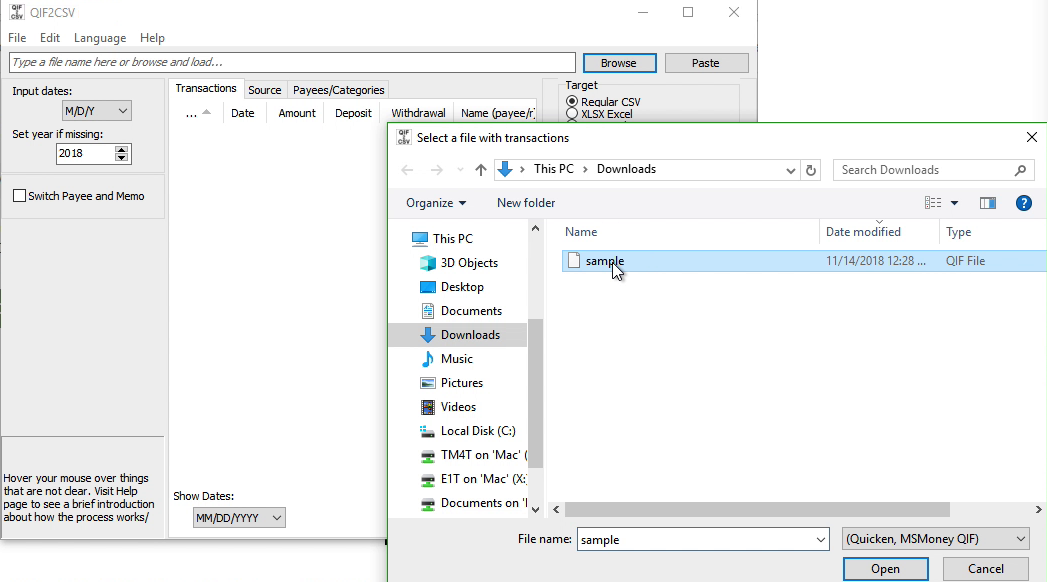
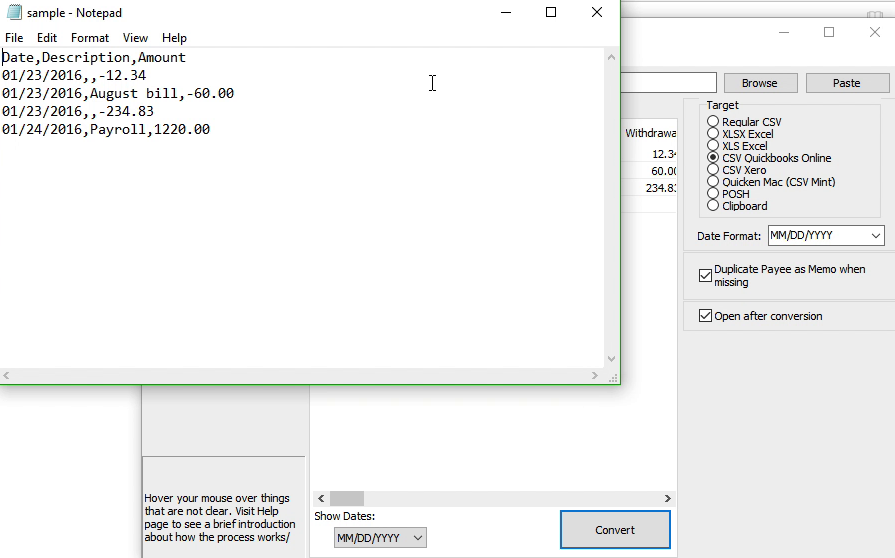
Make sure you are using the latest version of QIF2CSV. Download it from the QIF2CSV download page. Start QIF2CSV and select a QIF file.
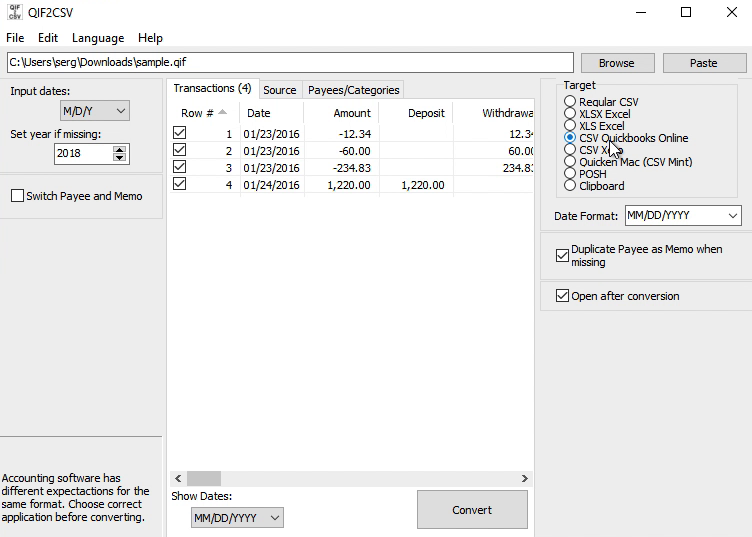
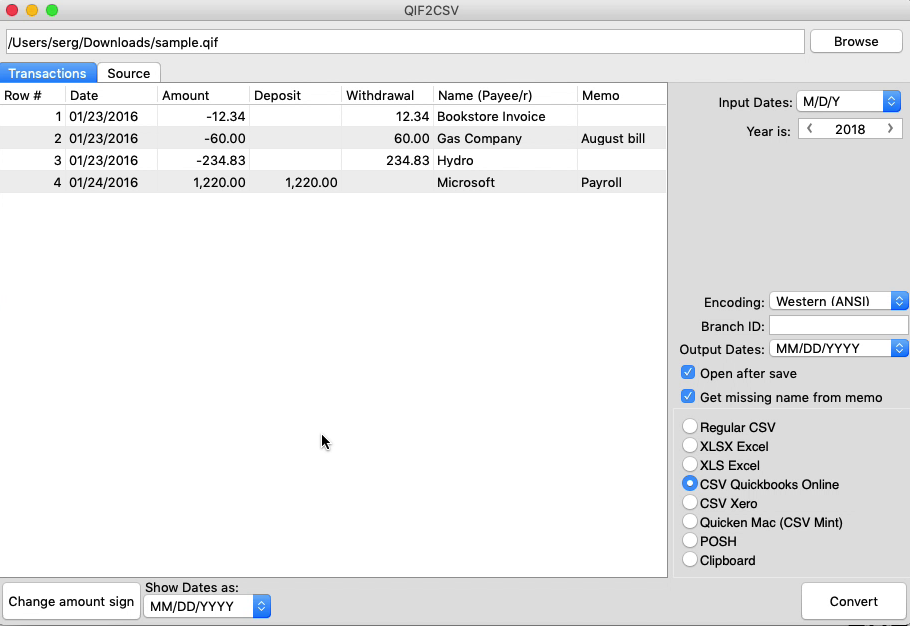
Review transactions before converting. Check that dates are correct, have the correct year, amount, withdrawals, and deposits are shown in corresponding columns.
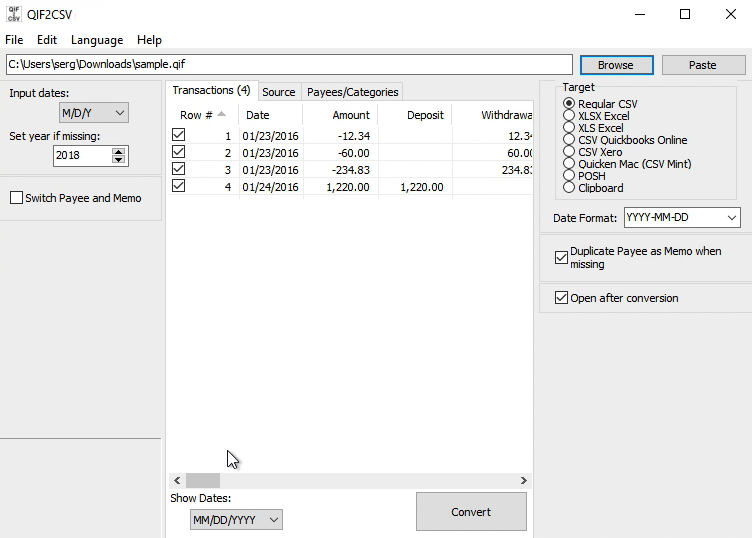
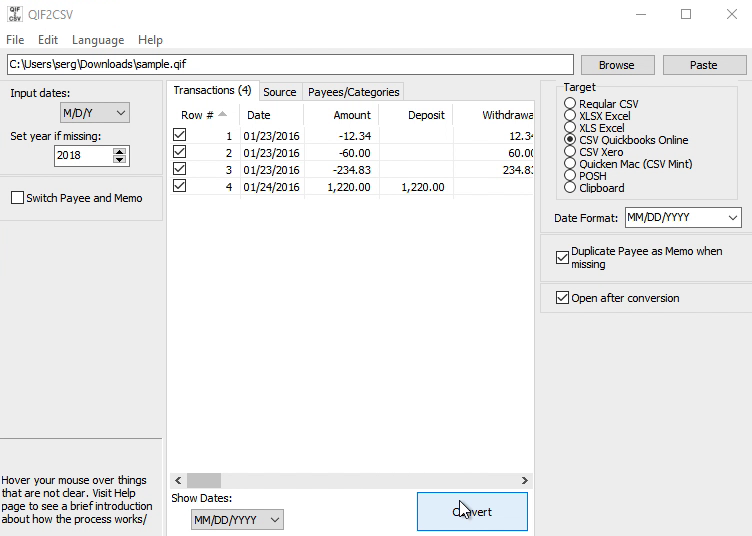
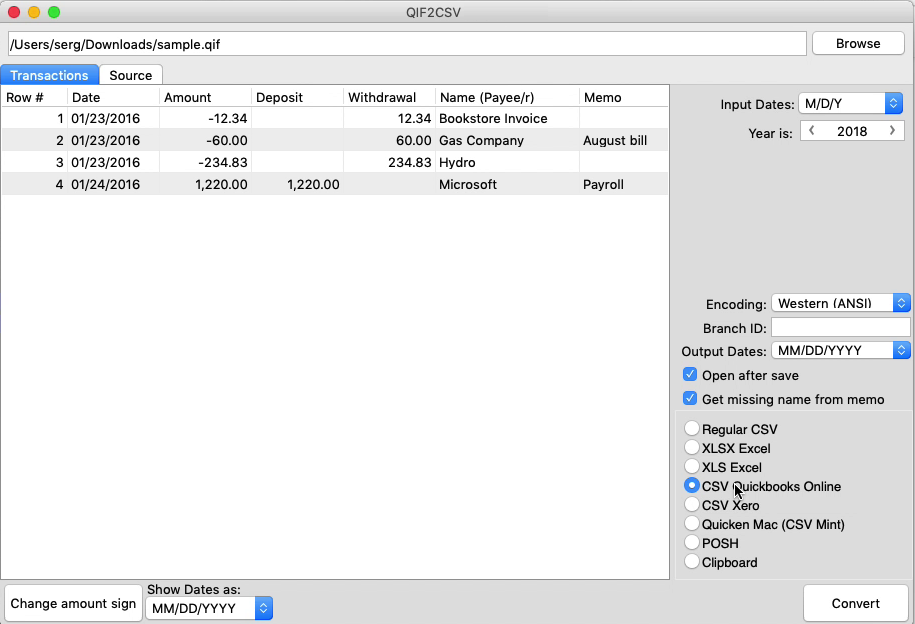
Choose the CSV target: Regular CSV, Excel (XLS or XLSX), Quickbooks Online, Xero, Quicken for Mac (CSV Mint), POSH or copy to clipboard to be pasted into any spreadsheet software like Excel.
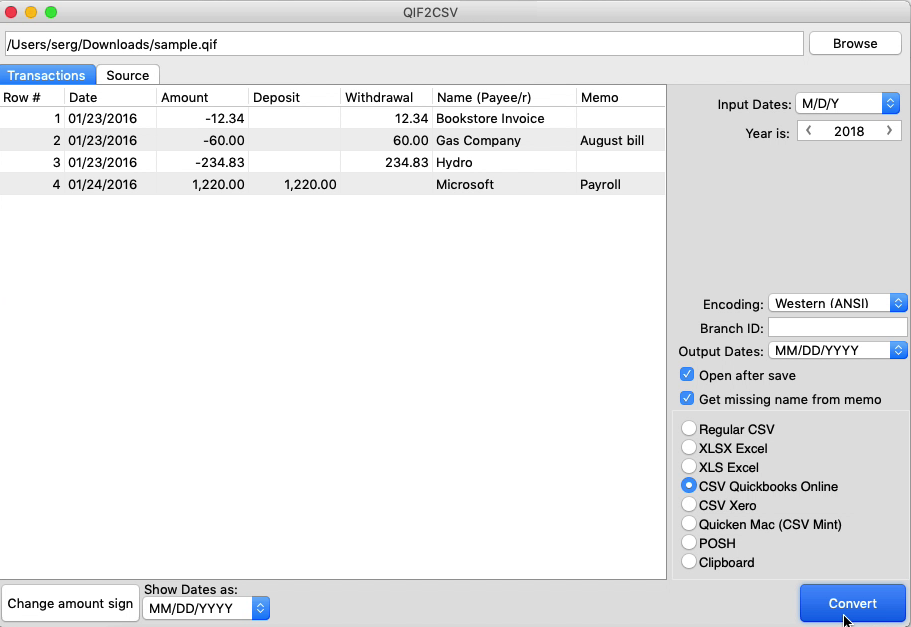
Click the 'Convert' button to create a CSV file.
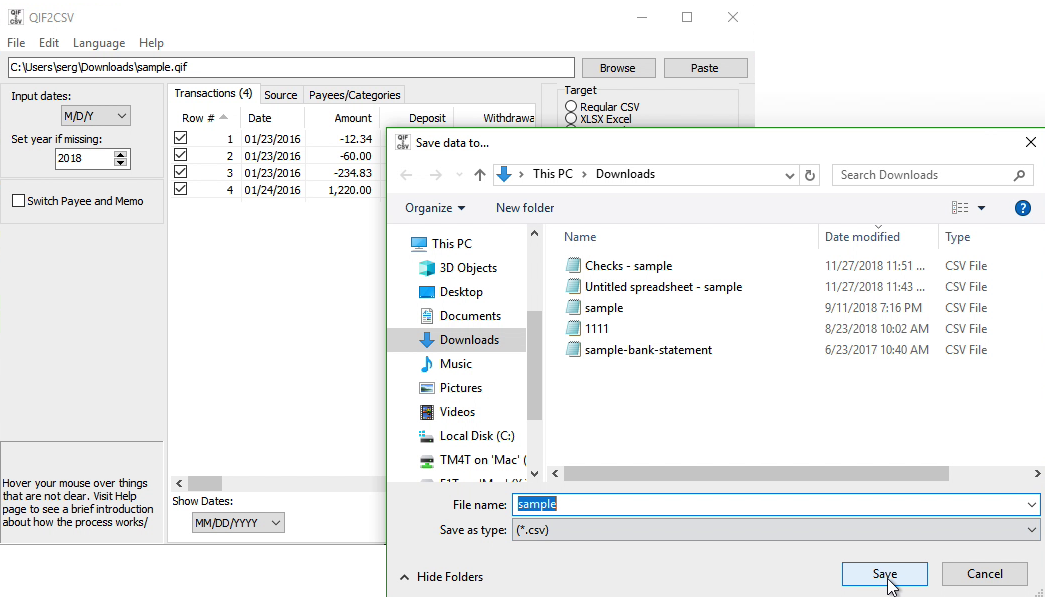
Confirm the file name and location.
Now the CSV file is created.
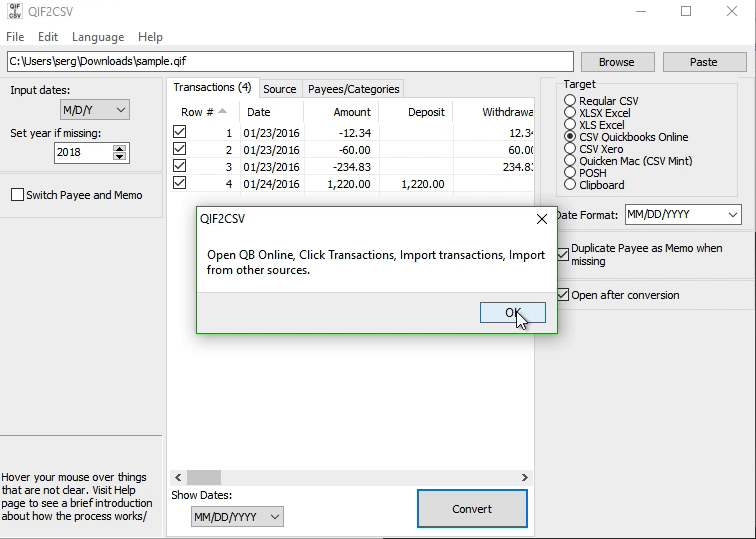
Review created CSV file and import it into Quickbooks Online, Xero or work with the file in Excel.
See this Windows tutorial as a video:
Step by step instructions for macOS
Make sure you are using the latest version of QIF2CSV. Download it from the QIF2CSV download page.
Start QIF2CSV and select a QIF file.

Review transactions before converting. Check that dates are correct, have the correct year, amount, withdrawals, and deposits are shown in corresponding columns.
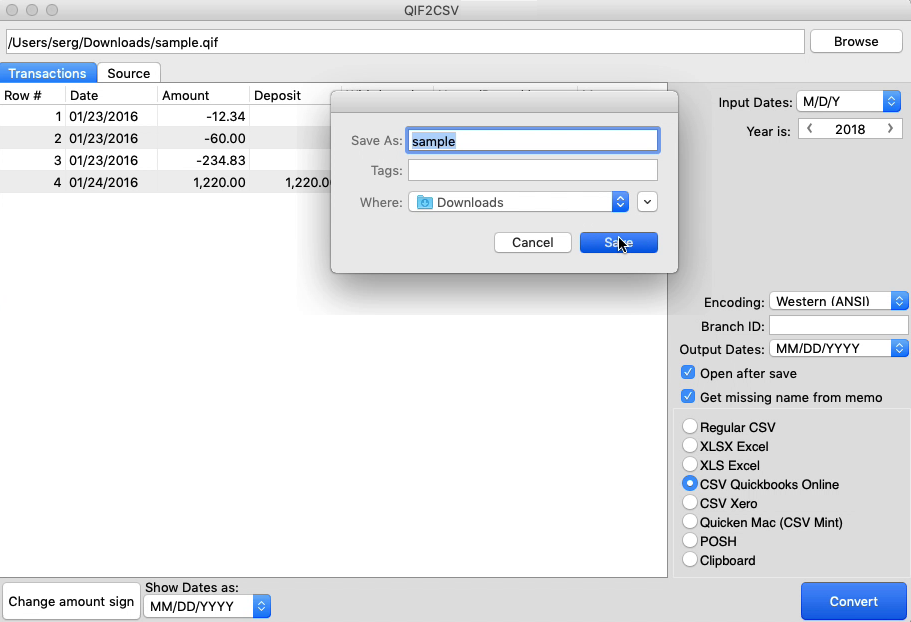
Choose the CSV target: Regular CSV, Excel (XLS or XLSX), Quickbooks Online, Xero, Quicken for Mac (CSV Mint), POSH or copy to clipboard to be pasted into any spreadsheet software like Excel.
Click the 'Convert' button to create a CSV file.
Confirm the file name and location.
Now the CSV file is created.
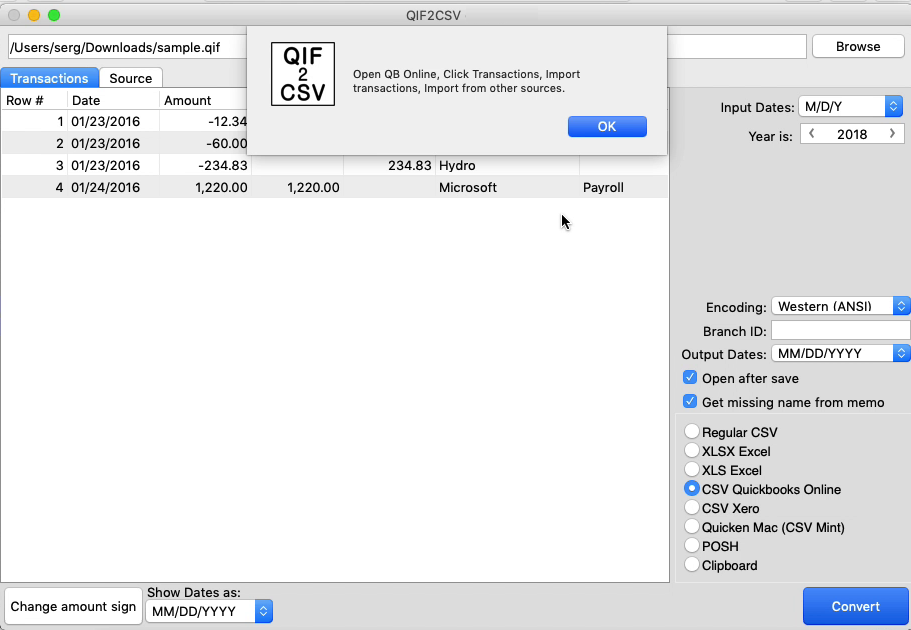
Review created CSV file and import it into Quickbooks Online, Xero or work with the file in Excel.

See this macOS tutorial as a video:
Related articles
- Convert CSV to QBO and import into QuickBooks Desktop or Quickbooks Online
- Convert CSV/Excel to QIF and import into Quicken, Banktivity
- Transactions: Make your transaction files importable into your accounting software
- Convert OFX to CSV/Excel
- Convert CSV files to OFX and import into Quickbooks Online, Xero, Microsoft Money
- QIF2QFX: Convert QIF to QFX and import into Quicken Classic
- Bank2CSV: Convert transaction files to CSV/Excel