Import QIF into QuickBooks Desktop: convert QIF to IIF
QuickBooks Desktop imports QBO and IIF files. Convert your QIF file to IIF first, then import it. Read the full QuickBooks Desktop import guide.
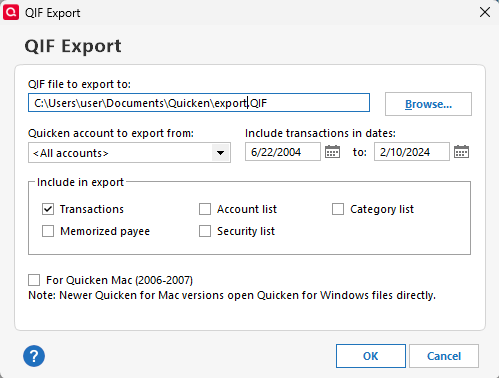
What is a QIF file
QIF is plain text with no transaction IDs and no account number, so apps can't use it to detect duplicates. Avoid converting the same period twice. Its dates can be ambiguous, such as 03/04/26, so confirm the date format in the app. QIF can carry categories, which are useful when the output needs expense and income accounts.
What is an IIF file
IIF is a tab-separated text format that goes directly into QuickBooks Desktop. Besides the date and amount, each transaction names the bank account, the vendor, and an expense or income account. More about IIF.
Why convert QIF to IIF
QIF is an older format with no transaction IDs and no currency, and many current apps don't take it. IIF goes straight into the QuickBooks Desktop register, keeps working when an older version stops importing QBO, and can name the vendor and the expense account. Each transaction needs two accounts, so set a category or a default account.
Before you import: back up QuickBooks
Back up your QuickBooks company file before you import any file, so you can restore it if something comes in wrong. On Windows, click File > Back Up Company > Create Local Backup. On a Mac, click File > Back Up, then Start Backup.
Step by step: convert QIF to IIF
- Download, install and start ProperConvert. The trial is free.
- Open your QIF file.
- Review the transactions to see how the app read your file. Check that the dates are correct, and that expenses are negative and deposits (payments to the account) are positive. The "Change +/-" button reverses the signs for the whole file, for bank and credit card accounts alike.
- Set the IIF settings below.
- Click Convert, then confirm the file name and location.
Set the IIF output settings
An IIF file goes directly into the QuickBooks database, so names must match what is in QuickBooks exactly:
- Account name: the bank or credit card account name as it appears in QuickBooks, not the account number. Sub-accounts use
Parent:Sub. - Payee: should match your vendor names. QuickBooks creates a new vendor for any name it doesn't find.
- Expense or income account: every transaction needs one. Use a category column in your file, or set a default account in ProperConvert.
See the IIF format.
Import the IIF file into QuickBooks Desktop
IIF works with every QuickBooks Desktop version, including ones older than three years, and doesn't need an internet connection. Transactions go straight into the register, with no review step and no undo, so back up the company file first.
- Make sure the accounts and vendors in the file exist in QuickBooks.
- Click File > Utilities > Import > IIF Files. QuickBooks needs to close all windows; click OK.
- Click Import IIF, open the file, and click Proceed.
- If QuickBooks reports errors, click Review now. Rows that imported are in the register. The failed rows are saved in a new IIF file: fix the cause, then import that file.
QuickBooks Enterprise needs exclusive access to the company file. QuickBooks Online doesn't import IIF.

QuickBooks Desktop IIF questions
Which format should I use, QBO or IIF?
Use QBO when QuickBooks is less than three years old and the transactions should go through Bank Feeds for review and matching. Use IIF when QuickBooks is discontinued, when the transactions should land directly in the register, or when each row must carry a vendor and an expense account.
My QuickBooks is older than three years. Can I still import?
Not with QBO. A discontinued QuickBooks version refuses QBO files and no longer connects to online banking. IIF still imports, because it does not depend on Intuit's servers.
Can I import into a sub-account?
Yes, in both formats. For QBO, match the file to the sub-account in Bank Feeds. For IIF, write the full path Parent:Sub as the account name.
Where do IIF import errors go?
QuickBooks writes a new IIF file next to the original with a timestamp in its name, containing only the failed rows and an error message per row. Fix the cause in QuickBooks, usually a missing account or vendor, and import the timestamped file.
Related QuickBooks Desktop conversions
- Import PDF into QuickBooks Desktop: convert PDF to IIF
- Import CSV or Excel into QuickBooks Desktop: convert CSV or Excel to IIF
- Import OFX into QuickBooks Desktop: convert OFX to IIF
- Import QFX into QuickBooks Desktop: convert QFX to IIF
- Import QBO into QuickBooks Desktop: convert QBO to IIF
- Import QIF into QuickBooks Desktop: convert QIF to QBO
- Import MT940 into QuickBooks Desktop: convert MT940 to IIF