Import OFX into Quicken: convert OFX to QIF
Quicken imports QFX, QIF and CSV files. Convert your OFX file to QIF first, then import it. Read the full Quicken import guide.

What is an OFX file
OFX is a standard format for bank data. It carries the date, signed amount, payee, optional memo and check number, a transaction ID, and the account type and ID. Those details carry over, so there is little to fix. Check the account type and that the IDs stay the same between files for the same account, because apps use them to detect duplicates.
What is a QIF file
QIF is an older plain text format for transactions, with a line for each date, amount, payee, memo, check number and category. It has no transaction IDs and no currency, and every Quicken for Windows version can import it. More about QIF.
Why convert OFX to QIF
An OFX file has the right data, but not every app accepts it: each one looks for its own variant. QIF carries categories and works in every Quicken for Windows version, including ones too old for QFX. It has no transaction IDs, so import each period only once.
Before you import: back up Quicken
Back up your Quicken data file before you import any file, so you can restore it if the transactions come in wrong.
Step by step: convert OFX to QIF
- Download, install and start ProperConvert. The trial is free.
- Open your OFX file.
- Review the transactions to see how the app read your file. Check that the dates are correct, and that expenses are negative and deposits (payments to the account) are positive. The "Change +/-" button reverses the signs for the whole file, for bank and credit card accounts alike.
- Set the QIF settings below.
- Click Convert, then confirm the file name and location.
Set the QIF output settings
In the QIF tab on the right sidebar, set:
- QIF target: the app and version you import into. It also sets the output date format.
- Account type: Bank for checking and savings, CCard for credit cards.
- Account name: exactly as it appears in Quicken. Quicken 2017 and earlier find the account by this name and offer to create a new one if it doesn't match.
See all QIF settings.
Import the QIF file into Quicken
QIF works in Quicken for Windows only; Quicken for Mac doesn't import it. It doesn't check for duplicates, so import each period once.
In Quicken Classic (2018 and later):
- Click File > File Import > QIF File and select the file.
- Select the account to import into from the drop-down list.
- Click Import and review the transactions.
In Quicken 2005-2017 (Deluxe edition or higher):
- Click File > File Import > QIF File, click Browse, and select the file.
- In "Quicken account to import into", select All Accounts. The file already names the account.
- Click Import, then Done. Review the transactions and click Accept All.
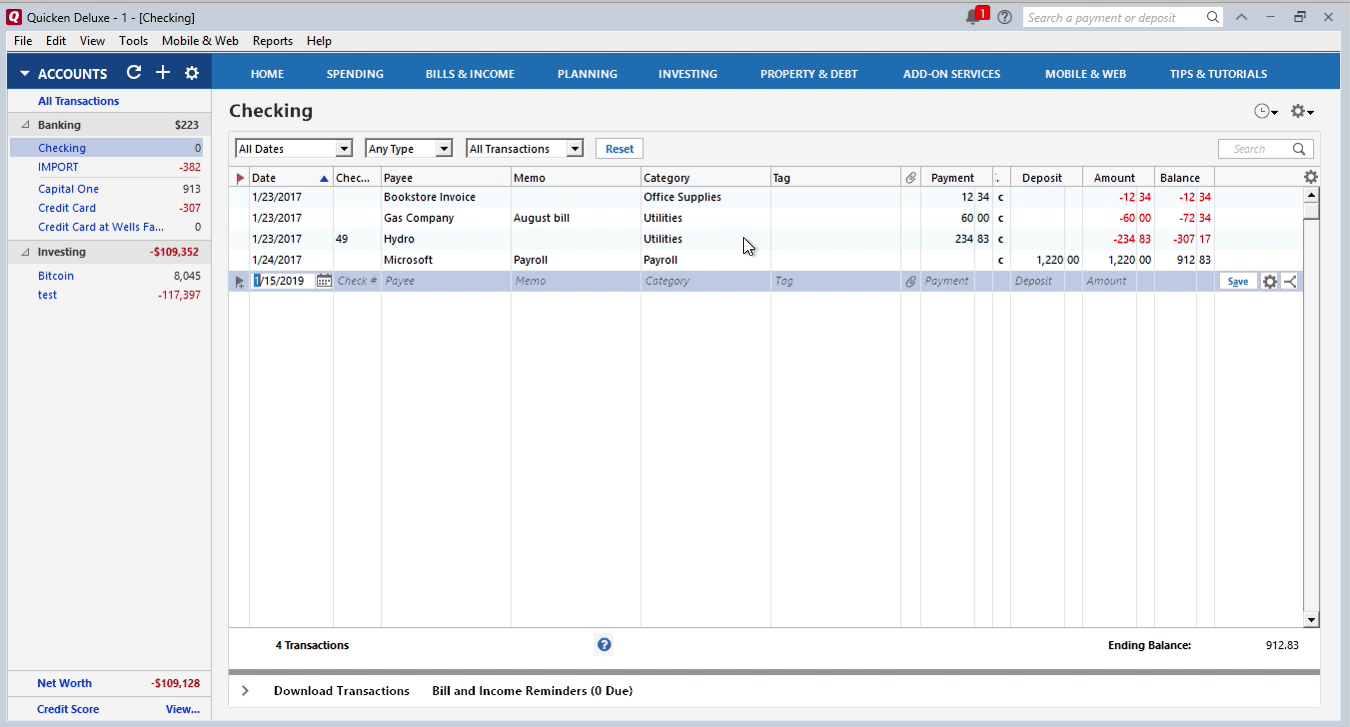
Quicken QIF questions
QFX or QIF for Quicken for Windows?
QIF when categories should come in with the transactions, or when Quicken is older than three years. QFX when the transactions should go into an account that already receives downloads and categories will be assigned by rules.
Can I import transactions into a discontinued Quicken?
Yes, as QIF. Quicken 2017 and earlier no longer accept QFX; convert the QFX or other file to QIF and import it.
Related Quicken conversions
- Import PDF into Quicken: convert PDF to QIF
- Import CSV or Excel into Quicken: convert CSV or Excel to QIF
- Import OFX into Quicken: convert OFX to QFX
- Import OFX into Quicken: convert OFX to CSV
- Import QFX into Quicken: convert QFX to QIF
- Import QBO into Quicken: convert QBO to QIF
- Import MT940 into Quicken: convert MT940 to QIF